Handstamped Labels and Custom Camera Straps
I did some old fashioned typesetting this week! It seems like I have wanted to make some custom labels for myself since the beginning of time. Why didn't I do it before? It is a very rewarding and fast project. I made a whole stack of custom labels, mostly using extra rectangles from this project (I really got carried away cutting rectangles of neutral fabrics - I had about 100 too many). I used a sans-serif clear acrylic stamp set from Martha (of course), to typeset my labels. It was tricky to get the alignment perfect, but I reason the slight irregularities just add personality. It was also tricky to recognize some letters backwards - lowercase "a", I am talking to you.

 Don't they look nifty? I have to admit, some of them were not as perfect as I would like, but after playing with a real commercial stamp pad later, I think this mainly boils down to technique; my stamping skills are sadly lacking.
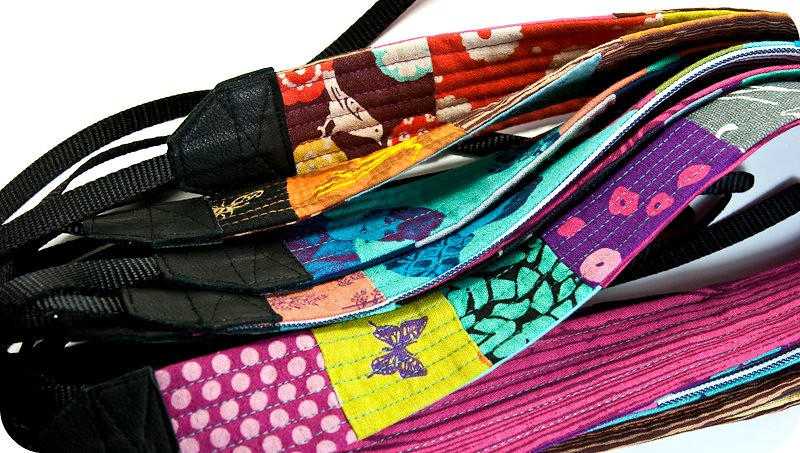
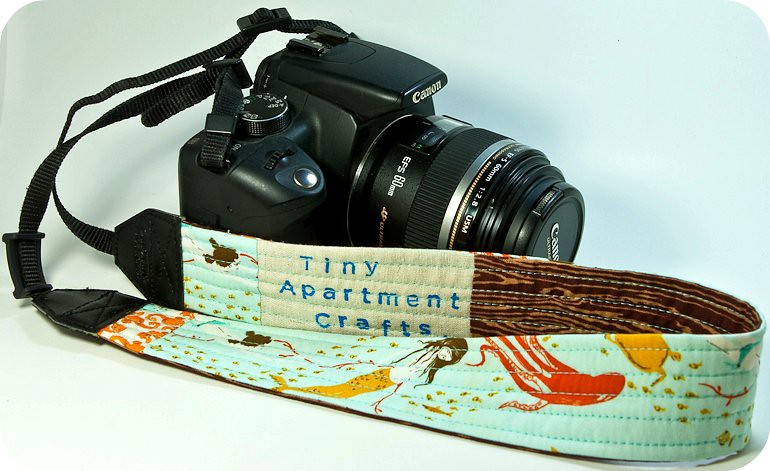
Of course, armed with a stack of freshly minted labels, I had to come up with a fun (and branded!) sewing project to use them in. What did I make? Camera Straps! This one is mine:
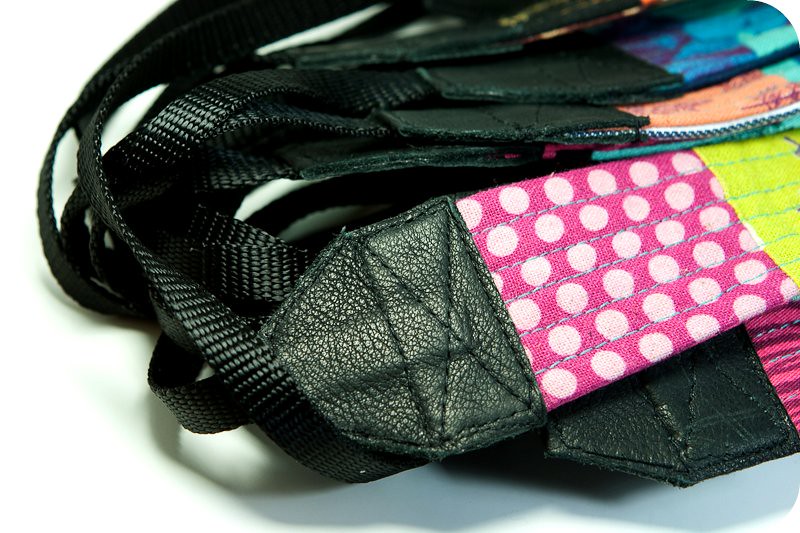
I have been saving this pretty Heather Ross print for a special project and the mermaids and sealife swimming across the strap look so cute. The back of the strap is pieced with a label printed in blue on natural linen and some of Joel Dewberry's new woodgrain fabric. My strap is lined with one layer of cotton batting to make it quilted and soft. I followed the basic idea from a camera strap tutorial over at My Sewcial Hour. I picked the stitches from my original camera strap, pried it apart, inserted my new strap into the pleather end pieces and sewed over the original stitching lines....
Don't they look nifty? I have to admit, some of them were not as perfect as I would like, but after playing with a real commercial stamp pad later, I think this mainly boils down to technique; my stamping skills are sadly lacking.
Of course, armed with a stack of freshly minted labels, I had to come up with a fun (and branded!) sewing project to use them in. What did I make? Camera Straps! This one is mine:
I have been saving this pretty Heather Ross print for a special project and the mermaids and sealife swimming across the strap look so cute. The back of the strap is pieced with a label printed in blue on natural linen and some of Joel Dewberry's new woodgrain fabric. My strap is lined with one layer of cotton batting to make it quilted and soft. I followed the basic idea from a camera strap tutorial over at My Sewcial Hour. I picked the stitches from my original camera strap, pried it apart, inserted my new strap into the pleather end pieces and sewed over the original stitching lines....


I'm participating, too, and I will definitely come by and throw my name in the hat! Your stamps look fantastic, and I just love the camera straps you whipped up.
ReplyDeleteThose look amazing!
ReplyDeleteThese turned out so cute!! Someone is going to be a lucky winner. :) Are you making the others to sell?
ReplyDeleteSuch a great idea! Love the results.
ReplyDeleteI think your labels look really good!
ReplyDeleteLove the labels! I need to work on some for me! Thanks for the tips.
ReplyDeleteSo is it bad I was really *really* hoping someone wouldn't respond to the "you're the winner email"? But I really liked the camera strap and was wondering if you'd be interested in selling one? I didn't see any details to that effect. I also notice you're in Canada, so I'd also be willing to do a trade if there are American items you have trouble getting (I live in Texas, if that makes a difference) Thanks for entertaining the idea!
ReplyDelete-Elizabeth
Elizabeth, your account is No-Reply! Can you email me? My email address is in my profile :)
ReplyDeleteThanks for linking up with me! Your straps turned out fabulous! Happy Sewing!
ReplyDeleteHi Gabrielle, I'm Connie at http://hotflashncraftn.blogspot.com/, I think I'm a g+ follower, I cant' figure that out.
ReplyDeleteAnyways, clever girl, coming up with this idea for handmade labels, have you priced them.....
Thanks for sharing. Hope you have a great day!
I have found this site. You can visit this site to boost your click speed specially for gamer who can check his or her click speed and can boost it Clicker Test
ReplyDeleteThis thing you have shared with us. A lot of thanks for this effective post. Image Retouching
ReplyDeletePhoto Editing Helps
Neck Joint
Photoshop Guideline
Clipping Path Tutorial
Drop Shadow Helps
Background Remove
Image Editing
Image Cut Outt
Photo Manipulation
I blog frequently and i really thank you for your content. The article has truly peaked my interest. 경마사이트
ReplyDeleteWhat a great article! I really love to read your blog, keep it up. 온라인카지노
ReplyDeleteI really like your writing skill, it's very unique. 카지노사이트
ReplyDeleteYou really work great for this post. Thank you for sharing! 온라인바둑이
ReplyDeleteThis post was awesome. Very informative and helpful for us. 바카라사이트윈
ReplyDeleteHello. splendid job. I did not anticipate this. This is a impressive story
ReplyDeleteThank you for fantastic post
ReplyDeleteThat is really interesting, You’re an overly skilled blogger.
ReplyDeleteI wanted to thank you for your time for this fantastic read!
ReplyDeleteThank you for the good writeup. It in fact was a amusement account it.
ReplyDeleteLook advanced to more added agreeable from you!
ReplyDeleteThe full glance of your website is great, as neatly as the content material!
ReplyDeleteI like the helpful information you supply to your articles.
ReplyDeleteWhat an awesome post, I just read it from start to end. Learned something new after a long time.
ReplyDeleteIt was a lot of fun and I truly had a good time reading your post.
ReplyDeletedata was very informative
ReplyDeleteI really enjoyed reading this
ReplyDeleteI should say its awesome post
ReplyDeleteThis is just great! So Continue
ReplyDeleteSuch clever blog work
ReplyDeletePretty good posts
ReplyDeleteAwesome and entertaining
ReplyDeleteinteresting and impressive
ReplyDelete
ReplyDeleteI’m glad that you simply shared this useful info with us
Amazing website hope to see more post of your post.
ReplyDeleteThank you so much for your great information, It is too useful for me. Thanks again!
ReplyDeletewow, awesome blog post. Much thanks again.
ReplyDeleteHave you thought about another topic to post?
ReplyDeleteThank you for creating a creative blog. It’s amazing
ReplyDeleteI think more people should see the comments you wrote.
ReplyDeleteI am happy to find your distinguished way of writing the post.
ReplyDeleteIt’s very interesting. And it’s fun. This is a timeless article.
ReplyDelete
ReplyDeleteYou are providing wonderful information, it is very useful to us.
I blog often and I seriously appreciate your content
ReplyDeleteI know of a roofing company if you are looking for Game Please get in touch!
ReplyDeletelooking forward for more posts. Thanks Feel free to visit my website;
ReplyDeleteWhere else could anyone get that kind of info written in such a perfect way?
ReplyDeleteVery informative article also check my blog post.
ReplyDeleteSuper site! I am Loving it!! Will return once more
ReplyDeleteI was very impressed when I found your writing. I'll come back often after bookmarking
ReplyDeleteHI, EXCELLENT BLOG. THIS IS HELPFUL FACTS TO US, KEEP IT UP. HAVE A GREAT DAY
ReplyDeleteI have a lot of spray lining knowledge but always learn something new.
ReplyDeleteI personally believe that the word “diversity” has multiple definitions
ReplyDeleteservice which means an equal connection of different colors.
ReplyDeleteso happy to find good place to many here in the post, the writing is just great, thanks for the post.
ReplyDeleteVery useful information shared in this article, nicely written! .sajitoto
ReplyDeleteI Was Eagerly Looking For Content Like This, Right To The Point And Detailed As Well Accordingly Depending Upon The Matter/Topic. You Have Managed This Greatly For Sure 토토사이트
ReplyDeleteI read this article. I think to make this article. I like your work. asicmining
ReplyDeleteYou have done an amazing job with you website 토렌트사이트
ReplyDeleteHey there! I simply wish to give you a huge thumbs up for the great information you’ve got right here on this post. I am coming back to your website for more soon. pbn indonesia
ReplyDeleteHello. splendid job. I did not anticipate this. This is a impressive story. 온라인바카라사이트 순위
ReplyDelete
ReplyDeleteVery good article. I’m facing many of these issues as well
ReplyDeleteNice post. I learn something totally new and challenging on blogs I stumbleupon everyday.
바카라사이트
ReplyDelete파워볼사이트
카지노사이트
파워볼사이트
Thanks for posting this info.
Your website is useful. Thank you for sharing!...AO
ReplyDeleteWow, this post is fastidious...AO
ReplyDeleteThis is a very interesting post. Thank you for posting a lot of interesting posts.
ReplyDeleteNice!Your article is extremely attractive and interesting, I need to to thank you for this great read!
ReplyDeleteI just love to read new topics from your blog.
ReplyDeleteNice Blog. Thanks for sharing with us. Such amazing information.
ReplyDeleteI appreciate your post thanks for sharing the information.
ReplyDelete
ReplyDeletefascinating topics if this draws a parallel to.
ReplyDeleteCongratulations on your article, it was very helpful and successful
ReplyDeletediscussed here? I’d really love to be a part of community where
ReplyDeleteThere are some very great ideas above thank you!
Excellent info! If you're in Coimbatore, check Solubilis for Private Limited Company Registration, LLP Registration, OPC Registration, Trademark, Patent, FSSAI, and GST Registration. Fast, reliable legal services by experts!
ReplyDelete