Friday, December 31, 2010

Happy New Year!


I wish you a wonderful New Year filled with creativity, learning and fun!

My blog is only one month old, but already I feel it has had a positive impact on how I approach crafting. I feel more motivated to complete projects that in the past may have lingered with neglect. Documenting my creative process is a challenging new creative outlet; using props, staging and lighting my photographs and making tutorials are all new to me and I hope to get better at it with practice.

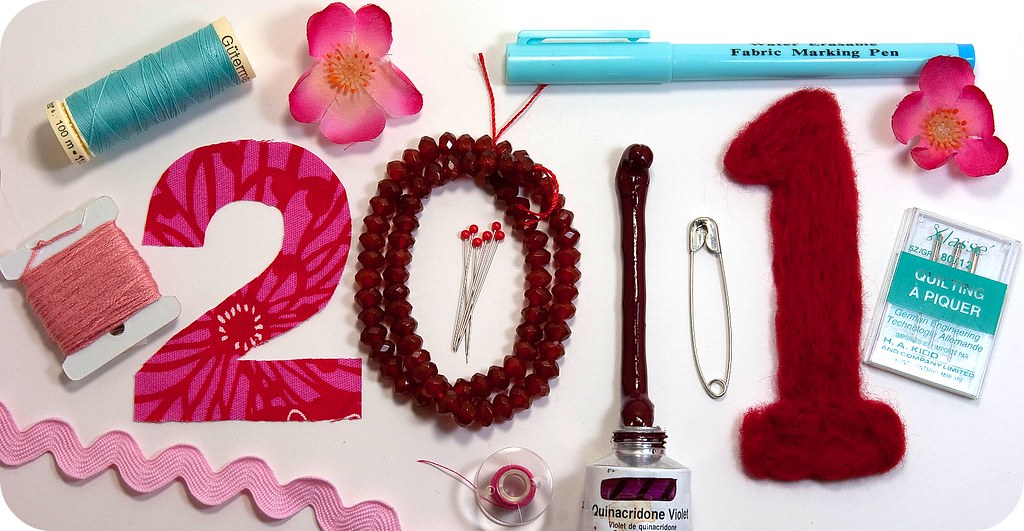
I want to keep up my blogging momentum in 2011, and while I have never held much stock in New Years Resolutions (I am usually breaking them by the first week), I do want to set myself some achievable goals for the New Year:

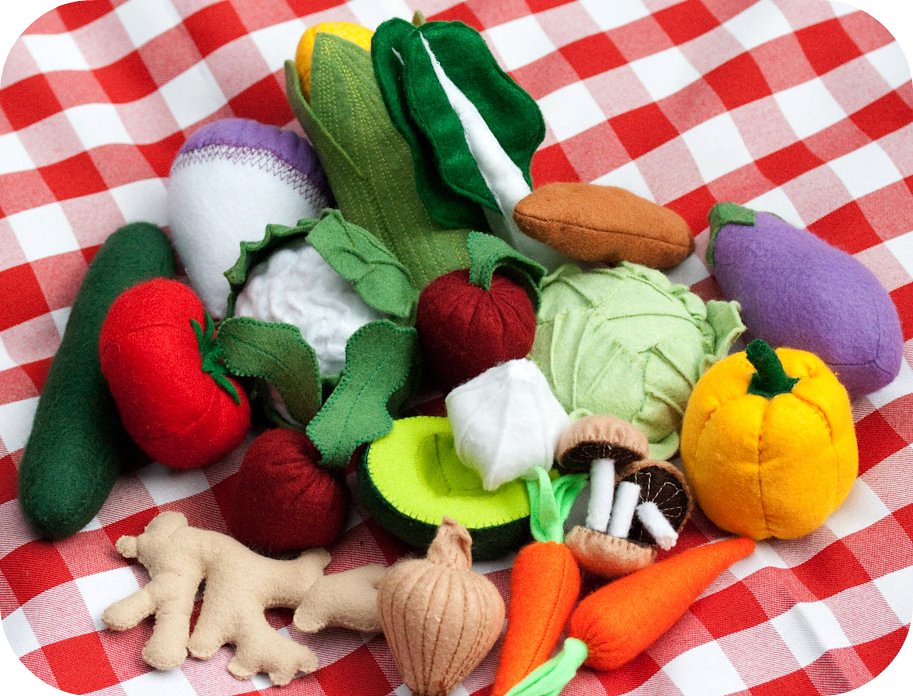
#1. I am participating in the Craft Book Challenge! I like the idea of really USING the books and patterns I already have (see resolution #2). It will also ensure that if I ever suffer from "crafters-block" I have something to fall back on, so I always have something to share with you.

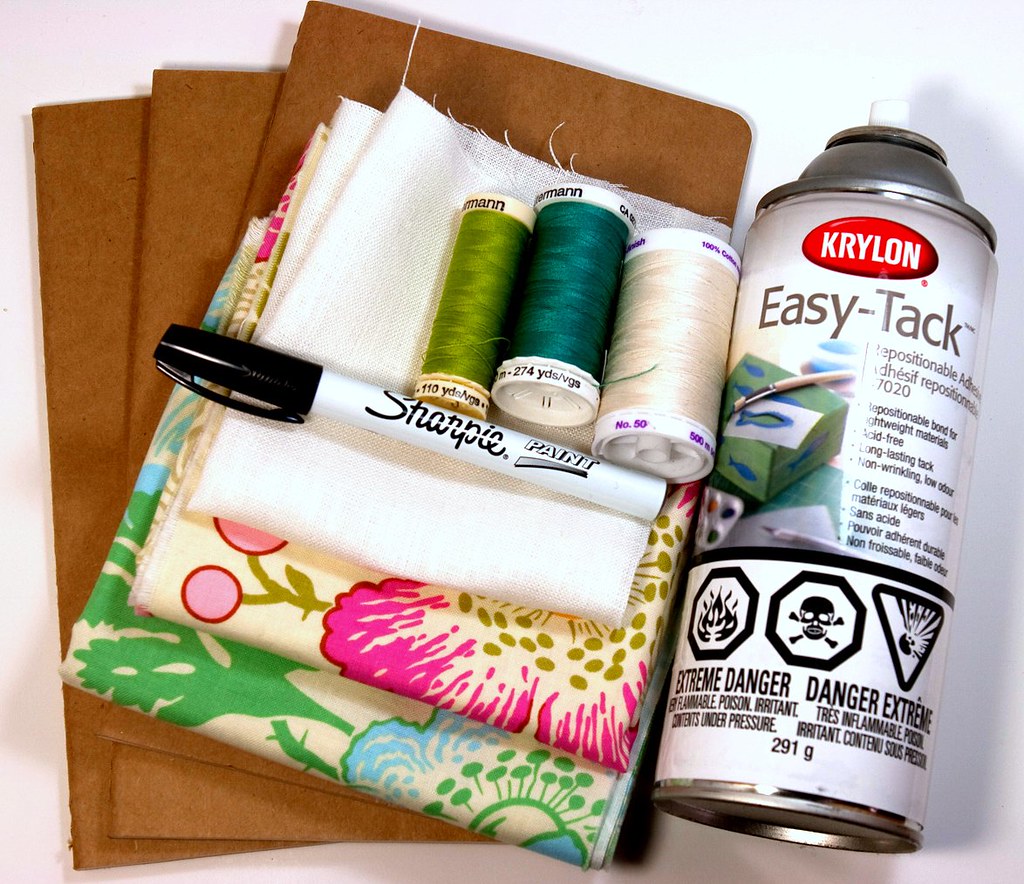
#2. Stash Busting! The Tiny Apartment is crammed full of fabric, trims, beads, paints, paper, glue, tools, canvas, wood, wire, and all manner of odd junk I think could be useful. I want to try to use as much from my own stash as I can, instead of buying new materials every time I have a new idea. (Um, except for this weekend, when my local Fabricland is having a huge sale. You see what I mean about breaking these resolutions??).

#3. At least a post a week. I managed 13 posts in 30 days! That's pretty darned good if I say so myself, but if I am realistic, it might not be achievable throughout the whole year. So I am promising you a post a week, and I mean to follow through.

So that's it from me. What are your plans for 2011? Are you setting yourself some goals too? I would love to hear about them! And if you have a big stack of beautiful pristine craft books on your shelf somewhere, I encourage you to join Liesl's Craft Book Challenge too (see the link in the sidebar).

Happy New Year from the Tiny Apartment!


Wednesday, December 29, 2010

So Cute! Tiny Needle Felted Fawn


Just a quick post to show you this little needle felted fawn. I think she is the cutest thing I have made all year! I was inspired by this little deer made by LuckyNielsen.

I figured out how to make my little deer by breaking down the body into a series of simple shapes. You know those "How to Draw" books we all had as kids that start with simple ovals and cylinders, and with a few extra lines to smooth between them, you have suddenly drawn a dog or a horse or something? I used the same idea, but imagined the shapes in 3D. When you connect the shapes together, using your needle, you smooth the transitions, and with a little extra poking, refine the shapes to look more like the animal you want to achieve. I think you could make anything you can imagine using this principle.

I used pipe cleaners inside the legs for added stability, but I didn't make a wire armature for the whole body, as I have seen other people do. I did it this way because I wanted to felt each leg individually (which is easier) and then attach them one at a time to the body.

This little fawn is only 3" tall. For the base, I made a grassy knoll out of felt that fits inside a large glass tea light holder from Ikea. Then I added a little Japanese cotton lace and some vintage flowers to up the cuteness factor to 100. I considered adding a little bow around her neck, but I thought that might make me pass out from a cute-overload so I held back.

PS: When you start making a super cute little fawn like this, you are just stabbing at blobs of brown felt. But when you add the eyes and the ears and it really starts taking shape, it is like you are repeatedly stabbing Bambi. Which can be a little disturbing. Forewarned is Forearmed.

Monday, December 27, 2010

Present Project: Kimono House Shoes


I made shoes! I really wanted to tell you about these but I had to wait until after Christmas. This project was so satisfying. I have made a lot of different things in the past, but walking around in your own shoes (even if you can only wear them in the house) is so neat. And I made 6 pairs! One prototype for me and then all these beautiful ones for my best friends and family. Before this project I had no idea how small the difference was between shoe sizes. It works out to only a 1/4" difference, so if you try making multiples, I would recommend storing each size in a separate bag to keep them organized through each step. I accidentally sewed size 7 uppers to size 5 soles and size 5 uppers to size 7 soles and ruined 4 shoes with one mix-up! Actually, there are lots of things to be careful of here, as you have to not only pay attention to wrong/right sides, but also left/right sides. Learn from my fail!


I found the pattern for the kimono shoes at ithinksew. They have lots of other cute patterns including these boots! The directions include sizes 5-10, as well as photos and are easy to follow. For me, the tricky part of this project was fitting the uppers to the sole. If you have ever tried to sew a shirt, it is sort of like setting a shoulder. But with a little clipping and shifting it works out every time. I used a really soft sheepskin for the soles, which makes them nonskid and a little more durable. If you try making these shoes with leather soles, use small binder clips to hold the upper and sole together. Also, as you only sew one layer of thin leather, I don't recommend "leather/vinyl" needles. They don't work as well as a regular "sharps" size 12 needle, which makes smaller holes and sews smoother, with no skipped stitches.

I found the wonderful soft sheepskin leather for my shoes at Leather World, in Victoria, BC. I had never bought a whole hide before (I usually use re-purposed old leather garments). The staff at the store were really friendly and helped me choose the right type of leather. After much searching I settled on a particular hide. Its only flaw was was a small hole in one spot. I mentioned this to my helper, she laughed, and said "Well they all have a hole somewhere". I was looking at bullet holes.

After a lot of experimenting, I found that I liked the soft structure and feel of a single layer of cotton quilt batting to line the uppers, but double layers of a dense poly batting for the insoles, as it seemed to compress less after wearing them around.

The inside of these shoes is lined with a cushy aqua cotton chenille. The print (which I am in love with and even used when I made my blog banner) is from the Modern Meadow line by Joel Dewberry. I have some more in my stash and I may even try to make a quilt from it someday! You might notice that it looks like I used the meadow print the wrong way around on most of my shoes. I considered putting it the other way, but really, when you look down at your own feet, the print looks the right way up; and if you are like me and looking down at your own feet in cute shoes makes you happy, you want to see the print the right way up too. After all, they are really only there to please you.


And because swanning about the Tiny Apartment in my super comfy slipper shoes made me feel like I should head to a spa, I made these little silk eye pillows to go with each pair of slippers. They are made with silk charmeuse, lined with the thinnest fusible interfacing I could find, and filled with flax seeds. I made my very first block print for the pillows using the fabric from the shoes for inspiration. The weight of these little pillows is really relaxing for the muscles around the eyes. You can also put them in the freezer or heat them briefly in the microwave which feels really nice if you have a headache. I could have added lavender to make these scented, but I like them just as they are. I don't think you really need a pattern if you want to make these, all you need are 2 rectangles of fabric, some flax seeds and some paper to use as a makeshift funnel. When sewing the end closed, use a row of pins to hold the flax back from the seam.

Have any of you ever tried sewing your own shoes? I would love to see what you came up with! I am sure to be making more, it was such a fun thing to do.

Friday, December 24, 2010

Merry Christmas Blogland! I hope wherever you are, and whatever you believe, you are having a nice time with family and friends.

PS: these fabulous and cute little octopus friends of mine were made using the (free!) Sigmund the Octopus pattern by the wonderful Futuregirl. You should totally try making one.

Tuesday, December 21, 2010

Last Minute Craft: Hammered Chain Statement Necklace

I made this necklace for myself after work this afternoon. I am planning on wearing it to my family Christmas party this year. But it would also be a great last minute gift for a friend who unexpectedly announces they will be visiting at Christmas, or to glam up your little black dress for a New Years Eve outfit. The nice thing about this design is that you can make it quite inexpensively, but it still turns out looking luxurious.

The chain is only a cheap gold coloured base metal, but the hammered links sparkle just the same. You only need 2 larger beads and 12 small beads to finish it off. My favourite colour is purple, so I chose large Italian glass bubbles in a purple spiral, and my smaller beads were faceted dark metallic purple glass. This necklace would look fabulous in any combination of metals and colours. I find I have quite a few larger beads in my craft stash that I bought on impulse because of their colour or shape, but which I later found too heavy for earrings, or too showy to work well with others in a design. If you have anything like that at home, they are perfect for this necklace.

What you need:
  • 12" small to medium chain (if you want a very long necklace, you could increase this)
  • 12" large hammered chain (or 6" lengths of different chains grouped together)
  • 2 large statement beads, something really fabulous from your stash if you have one
  • 1 lobster clasp, to match the metal you chose for your chain
  • about 8" of wire to match chain, you can use 20 or 22 gauge
  • 12 or more coordinating crystals or beads, about the width of the medium chain
  • Flat and Round Pliers, Wire Cutters
I am assuming a basic knowledge of jewellery making in the following instructions. If you have never done anything like this before, it just takes a little practice. The only skills you need for this project are how to make a loop of wire, and how to make a wire wrap. I found this link to a very clear video showing the whole process of making wire wrapped loops.

Instructions:
  1. Fold the large chain in half and put both ends in a wire loop. Wrap the wire 2 or 3 times.
  2. Add a statement bead sandwiched between 2 smaller beads on the wire and close with a wrapped loop. This loop will be one end of the necklace.
  3. Hold up the necklace to find the middle of the large chain, move over at least one link from the center so that the chain hangs nicely. Put this link in a wire loop, wrap wire like you did before.
  4. Add the second statement bead and two small beads onto this wire and make another loop.
  5. Pass one end of the small chain into this loop and close the loop with another wrap.
  6. Make a small wire loop, add the lobster clasp, wrap this loop.
  7. Add 3 small glass beads to the wire. Make another loop, inserting the other end of the smaller chain. Close this with a wire wrap.
  8. At this point, go and try on the necklace in a mirror. Decide if you want to make it shorter or longer. If you want it longer, make one or more cuts in the small chain and insert lengths of wire wrapped beads (groups of 1, 3 and 5 look nice). If you want to make it shorter, you can cut out a section of chain and add a shorter length of wire wrapped beads. I added beads to just one side of the necklace because I thought it needed a little asymmetry.
 All done! Now you are all ready for a night on the town.

Monday, December 20, 2010

Last Minute Gift: Fabric Covered Notebooks

Do you still need a last minute gift idea? I just made this cute little set of 6 fabric covered notebooks and it only takes an hour to do! On top of that, this is a great stash-busting project, as you can make 4 journal covers with just one fat quarter. I chose these pretty Amy Butler prints that I had been saving for a rainy day. These notebooks are great gifts for anyone who likes writing, or staying organized, or just likes jotting things down so they can remember them later. To make this gift really special, you could include a nice pen, or some pretty stickers.

To complete this project you will need some small journals (I used Moleskine 5" x 8 1/4" ruled journals, which come in packs of 3), some quilters cotton or similar lightweight woven fabric and Krylon Easy-Tack repositionable adhesive. I also used some white linen, a Sharpie paint pen and some coordinating thread to make labels for the fronts of my journals. You could also choose another fabric or trim to decorate the fronts of your notebooks.


I cut my fat quarters into 4, each about 11" by 10" which worked perfectly for the books I had. If you are using different sized books, you want to cut your fabric about 1/2" bigger all around than the size of the journals cover.

You can customize the fronts of your notebooks like I have by writing on white linen, or other solid coloured fabric, with a Sharpie paint-pen. Cut out the text in any shape you like and sew to the front side of your print fabric with a zigzag stitch in a coordinating colour. Pull the thread ends to the back, hand knot and snip short.

Mark the center line lightly on the wrong side of your fabric with a pencil. Make 2 small snips on either side of the center line, top and bottom, as wide apart as the bound spine of your notebook. Fold and glue these tabs down. Lay fabric right side down on some newsprint and spray the back with the glue. Line the spine up with the center and smooth the fabric down on each side of the cover. If you don't get it right the first time, the adhesive is repositionable, so you can peel back each side and smooth down any wrinkles. Open the book, clip the fabric around the corners. Fold the clipped corners down first, and then the sides for each cover. Done!

Sunday, December 19, 2010

Tiny Apartment Crafts Giveaway Winners! (Or: The Internet Really Likes Owls)

 Thank you so much to everyone who left a comment on my blog during the Sew Mama Sew Giveaway. All the positive feedback was overwhelming and I really appreciate it. This was my first giveaway and I will definitely be participating in more.

When I was choosing fabrics for my giveaway l knew I wanted to use the Echino print I had been hording, but had no idea which animal would get the most attention. The results were so interesting that in the name of science I made a little chart:  

So you know what the internet likes? Owls. It likes them a lot! I better get busy and come up with some more owl-themed projects pronto! Anybody have a great idea they need a craft-guinea pig to try out?

The winners were chosen using the random number generator from random.org.

The Winners! Congratulations to:
Maddie from New York State, who will be receiving the (much coveted) Owl wristlet.
Manuela, a sewing blogger from Portugal! who will be receiving the lovely Tiger wristlet.
Bonnie, a crafty blogger from Ohio, who will be receiving the Yellow Bird wristlet.

All 3 winners have been contacted and can look forward to receiving these pretty hand painted envelopes with their prize soon after Christmas.

Thank you again for all your kind comments. There will be lots more posts and tutorials to look forward to in the New Year. Happy Holidays from the Tiny Apartment!

Friday, December 17, 2010

The Golden Snitch! Ornament Tutorial


Yup, I wore a hastily made clip-on felt Gryffindor tie to the premier of Harry Potter this year. This officially makes me a crafty dork, but it also means I had an uncontrollable urge to try making a Golden Snitch ornament for my tree. They turned out really nicely and I thought there might be one or two other crafty Potter fans out there who would like to know how to make one too.

First, draw an actual size sketch of how you want your snitch wings to look on a scrap piece of paper. Use this as a guide to shape thin craft wire into your wing shape. Close the shape by twisting the wire around the other one 3 or 4 times to make a tight coil. Snip the wire close to the coil. Make 2 (I made 4 as I am giving another Snitch away to my lovely sister).

Coat wires with glue and lay a sheet of tissue paper over top of wires. Use a clean dry brush to push down on the paper, sticking it down to the wires all around each wing. Let dry, then cut out, leaving a few millimeters of paper as a border. Apply glue to border and roll over edges of wire all around the wing. Coat wings on each side with white glue and apply light gold glitter. Let dry.


I used a mixture of brown and gold acrylic paint to paint the swirly 'snitchy' markings on the golden ornaments. I did this mostly from memory and they don't look like movie replicas, but I am okay with that. It occurred to me that if you had a fine-point brown sharpie and one of those gold paint pens, you might be able to achieve real greatness here. I chose to use glass ornaments, because I had them already, although plastic might prove easier to attach the wings to.

Use a small dab of hot glue on the wire coils to make a surface for attaching to the ball. I held each of them vertically against a piece of parchment paper. They don't stick to the parchment (or the glass balls, I tried this first), so just hold each one until the glue cools and a flat surface has formed on the bottom.

I tried a bunch of glues to get the wings to stick to the glass balls. Hot glue pops right off, white glue takes too long to set, even Super Glue didn't work. Finally I tried my trusty Fabri-tac, a glue which I only recently discovered (that I cannot live without), which is like a very strong type of rubber cement, and success! Hold each wing until the glue sets (about a minute or so), then cover glue with gold paint. Tadaa! Go hang it on your tree and get yourself a cookie, you deserve it :)

Sunday, December 12, 2010

Giveaway Day is Here!


The Giveaway is now closed, thank you so much for visiting, and thanks to all of you who participated. I will be announcing the winners soon.

This is my very first giveaway and I am so excited! I am giving away 3 adorable zippered wristlets, each one unique and handmade by me. I will be randomly choosing 3 names once the giveaway closes on December 17th and contacting the lucky winners by email. Anybody can enter, and I am willing to mail these anywhere in the world. Please check the bottom of this post for entry instructions. This giveaway was organized by the wonderful people at Sew Mama Sew; click the giveaway button on my sidebar to see a complete list of all the participants.


These handmade wristlets have silver plated double chain handles and brightly coloured zippers. They are made of super soft upcycled dark brown leather from a vintage skirt and a Japanese Echino printed cotton. The lining is bright pink cotton with a card pocket inside. They measure about 7" by 3.5" and as you can see, they have enough room to hold a phone, a small camera or some makeup basics, along with a little cash or cards. They are also long enough to fit standard pens and pencils. These little wristlets are great for a night out when you don't want to carry a purse, and they also work as organizers for a few special items, slipped into a bigger bag.


I have a lot of ideas for future projects and I am really looking forward to sharing them. If you are interested in seeing more of what I'm doing please subscribe to my blog. Thank you all so much for visiting. Good Luck!

Thank you so much to everyone who participated, comments are now closed, and I will be announcing the winners soon.

Friday, December 10, 2010

Tiny Apartment Crafts is having a Giveaway!!


Please visit my blog on Monday, December 13 and leave a comment to enter to win one of three pretty made-by-me zippered clutches. The giveaway will remain open until December 17. Who's going to win? It could be you! This is part of an organized giveaway event by Sew Mama Sew. You should check out all the other participants, there will be lots of amazing handmade items up for grabs!

For a sneak peak at the giveaway prizes, check out my flickr!

Wednesday, December 8, 2010

Modern Christmas Village for a Tiny Apartment

I have always loved the beautiful vintage cardboard houses in Christmas villages. Unfortunately, in The Tiny Apartment, there is no mantle piece, no empty bookshelf or spare side table on which to set up a village for the Christmas season. But this year, I have come up with a great solution so that even tiny apartments like mine can have a little snowy village complete with lights and mini trees. It takes up just 9 inches square of wall space, and who can't spare that?

I made my village over 2 evenings, with a little time spent hunting down the supplies first. If you want to make your own village there are some special supplies you will need: a 9" square, deep shadow box frame, plaster of paris, small square dowels, mini trees, small sheet yellow vellum, glitter card stock, white fiberfill or other fake "snow", small rectangle of thin white acrylic batting and a short string of battery powered miniature LED's (much smaller than regular tree mini lights). You might be able to find the lights where Christmas village sets are sold. I found mine for 5$ at Michaels. Basic craft supplies you probably already have include some old cereal boxes, assorted glitters, hot glue gun, white glue, old paint brushes, craft knife and scissors, heavy background paper, craft wire and wire cutters and any other decorations you want. 
First make your little houses. If you are lucky enough to own some real vintage houses, you can skip ahead and use this project as a great way to display them! I cut my houses out of thin cardboard from cereal boxes. I also made a fence to go in front of the houses out of a double layer of cardboard, cut to fit the interior width of my frame. Remember to glue vellum down inside windows and door opening before gluing houses together with glue gun. Cut a hole in the back of each house just big enough to accommodate a single light. If you need help designing your houses, Twelve22 has a great free printable house pattern here to get you started. Remember that everything gets coated in glitter and plaster so if you make any mistakes they will not be visible later.

Coat sides of houses with white glue and then glitter. Mix up plaster of paris according to directions on box, it should be smooth and about as runny as pancake batter. Use an old paint brush to apply to roof, window and door frames, the top of the chimney and the fence. I added another layer of plaster to the houses once they started to set. Sprinkle a little extra silver glitter on the roof after plastering. I also dipped some really cheap green fake trees in the plaster, and then dusted with white glitter to make snowy trees, which turned out great! I found them in a dollar bin at a model railway store, much cheaper than the trees sold with other Christmas decorations. Set everything aside to dry overnight.

Measure and mark a line 3/8" inside the back edge on all sides and glue doweling behind this line with hot glue (cut to fit about 3/4 of the length of each side). Use short sections of dowel to secure battery box (glue dowels down around box, don't glue box down) against the back dowel with "on-off" switch towards the front. Cut vignette out of glitter cardstock to fit inside the frame; make a notch for the battery box and another small notch on the opposite side for the light cord. Make little wire "hooks" and glue to back of doweling to secure lights around frame. Leave an LED for each house and then pull string to back of scene and attach by bending hooks around wire (see process shots). Glue glitter cardstock to dowels. Make a snowy ground with white batting. Position houses and poke remaining lights into each. Glue down front fence. Insert trees and then fill in any gaps with a little fiberfill; use fiberfill to cover on-off switch on battery box too. Cut background paper to fit and glue to back of frame. Hang and enjoy! Whew!

OK, so this project has a lot of steps, but it isn't very difficult and with a little patience the beautiful results make it worthwhile. If anyone tries this out please let me know, I would love to see your photos! To see more photos of this project you can check out my Flickr.

Sunday, December 5, 2010

Playing Catch-Up: Felt Playfood Set


This summer, I made a huge collection of felt foods for my best friends daughter. The project sort of got out of hand because making felt food is more addictive than you would realize. It was interesting and challenging to figure out how each 3D shape could be made from cut shapes of felt. There are lots of tutorials for felt foods out there, so here are just a few pictures to get your imagination going. A small group of felt food pieces would make a great economical present for a young child who likes playing little chef. More pictures on my Flickr.


One of the things I did with this project was try to make it as interactive as possible. Some of the vegetables were made in two or three parts, to show the insides, with velcro buttons so they could be "cut" apart and put back together. Whenever I could, little extras like butter, syrup, cheese, veggie slices or buns were not sewn together so that they could be stacked freely, and mixed and matched in imaginative ways. I actually made a lot of fruits and a few sweet treats as well, but never had the time to photograph them before they went to their new home.

Friday, December 3, 2010

Needle Felted Terrarium and Mushroom Tutorial

A while back, I saw a post on Craft about everlasting terrariums which I really loved. I wanted to do a similar project, but make my own mushrooms with needle felting. This project was extremely fun to do and also looked amazing when it was finished. There are so many ways to customize your terrarium; you could make different mushrooms, add real forest objects like dry leaves, rocks or tiny pine cones, or you could even add kitschy items like vintage ceramic animals or little gnomes.

I had never needle felted anything before, but the low cost for one barbed needle and a couple ounces of wool roving made me confident to just give it a try. I also lucked out and found the perfect glass "terrarium" at a second hand shop for 2$. Needle felting is pretty easy; you just loosely form shapes with your wool, rest them on a piece of thick foam (to protect yourself) and stab at it with the needle until it becomes firm and takes shape. I didn't have any instructions for my mushrooms, and sort of came up with a process as I went along.

To form a mushroom, felt a flattish pancake of wool, adding as you go to the top so that it forms a smooth dome, or whatever profile you want your cap to be. Turn it over and punch an inner circle to make an indent. The wool pulls together and firms up as you needle it, so that is how the indent forms. Roll a log of your stem-coloured wool and fold the bottom end over itself; this will make the stem end a little bulbous when you felt it. Leave the very top of your stem unfelted. Tease this out into a flat circle and center inside your cap. Stab the needle all around the stem into the cap, pushing the "gills" inside the indent. If you are making a polka-dot mushroom, roll tiny balls of wool and attach them to the cap by gently stabbing them with the needle. Be very careful not to stab yourself at that point, the needle is very sharp! I found that when I was finished, there were little stray fluffy hairs that needed to be snipped off with scissors in order to make the surface smooth.

If you follow the Craft tutorial for how to make your terrarium base, I should mention that I pushed wires into my mushroom stems (use a gentle jackhammer motion, twisting didn't work as well) and then just poked them into the moss base instead of using glue. Because nothing is glued down I can rearrange them as much as I like and if I ever want to make any changes I can.

If you live in Victoria, BC and are interested in learning more about needle felting, or if you are looking for a great place to get supplies, I recommend heading over to Knotty By Nature Fibre Arts, on Government St. in Victoria, BC. They were really helpful when I walked in with this project idea and I like supporting local businesses.

I also made some tiny fabric ferns for my terrarium. You can see a photo and short description of how they were made here. I have to be honest and tell you that the ferns were a huge pain in the ass to make. It was an incredibly fiddly job getting all of the leaves to stay on and align properly. If I was to make this again, I would cut the leaves out as attached pairs instead of individually in order to make it easier.

Tuesday, November 30, 2010

Hello There

I am so excited to begin my first blog! Reading other crafting blogs has been such a great source of inspiration, ideas and techniques, I only hope that I can inspire someone else out there. Like most crafty people, I have always found myself saying "I could do that".  Recently I realized that what I really wanted to do, was to write my own blog.

I live in a tiny apartment with very little room to spare (well, no room really), so this blog is about what you can achieve in a small space, within a similarly sized budget and some ingenuity. You can achieve a lot! I am always trying new things, so if you aren't interested in one project, please check back, it will probably be something completely different the next time.

Back to crafting!