Showing posts with label embroidery. Show all posts

Sunday, March 20, 2011

Pattern Review: Family Tree from CozyBlue

Update: Pattern is now for sale in CozyBlue's Etsy Shop!

When Liz from CozyBlue asked me if I would like a free review copy of an embroidery pattern she was developing based on her custom screenprints I jumped at the chance. I had seen her screenprinted family trees before and I really love them. They are the perfect modern family tree. The design is fresh and striking, I love the clean lines, and that little heart at the center of the tree rings is adorable. These family trees would make wonderful presents for Mother's Day, or for the nursery of a new baby. I made mine for a good friend, as a housewarming present for her new home.

Liz did a really good job with her instructions for transferring the pattern to both light and dark material, and the pattern includes different shapes and sizes of extra leaves, so you can customize your tree however you like. The design is almost fool proof, all the lines are slightly irregular, so even if you make a minor mistake with your stitching, nobody will ever know the difference. Depending on how much extra embellishing you want to add to your family tree, I think this is a weekend project for most crafty people, from transferring the design to framing. 
I really loved the indigo and greenish yellow that Liz used in her print so I kept the colours the same in my project. I have been really inspired by the work of Melissa Crowe and that is where I got the idea to add some felt applique for both added texture and solid colour. If you would like to do the same, I traced the original pattern onto the matte side of some freezer paper, lightly ironed the paper shiny side down onto my felt and then I was able to cut out the pieces easily and accurately. After removing the freezer paper, you can flip the felt pieces upside down and lightly spray them with spray adhesive so that they stay in place while you stitch them down. I used tiny running stitches with a single strand of embroidery thread to hold the felt in place.

Some of my favourite parts: I really love the tiny little french knot umlauts, the perfect little yellow leaves and the tiny stitches in the felt bark. I also love how the concentric rings of backstitching look, leading to the little knot and heart in the center of the log. It was very soothing and hypnotic stitching these rings, turning the piece around and around in my hands as I went.
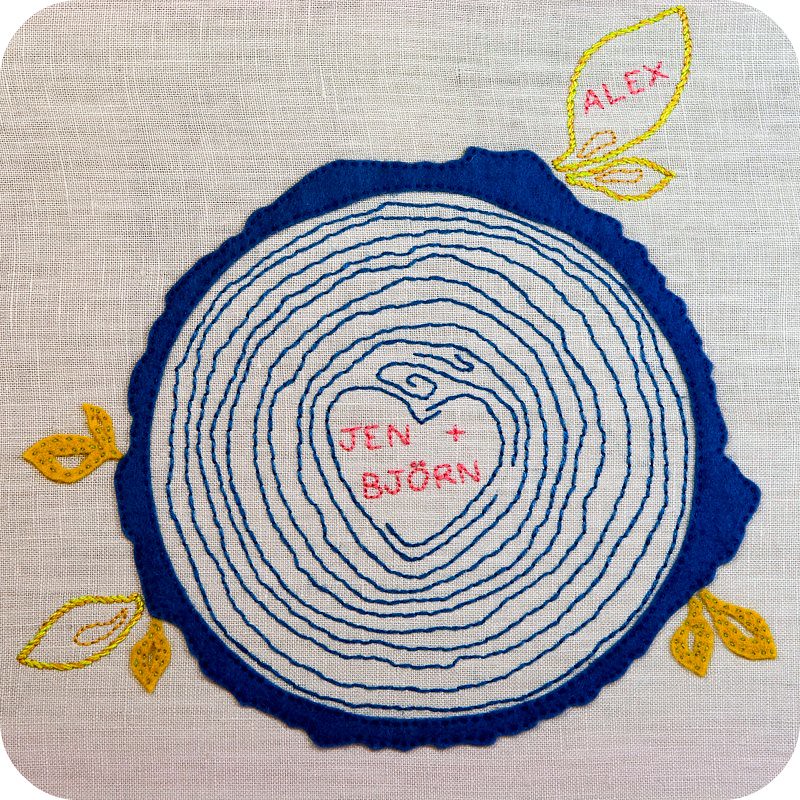
To frame the finished family tree, I stretched the linen over a 10" square wooden canvas. I think it would look just as good framed in a 12" embroidery hoop. The only problem I had with this pattern is that people with very long names might find it difficult to fit them into the limited center space in the design. I think it would be relatively easy to work around this using a copier to enlarge either the whole design, or just increase the center heart design and eliminate one or two growth rings to make room for the larger center.

Liz is planning to have the pattern available in her shop in the next two weeks, but in the mean time she has lots of other cute stuff available, including all sorts of customizable family tree prints, heart pillows, and adorable welcome baby prints with fabric bunting. Check it out at http://www.cozyblue.etsy.com/

Friday, March 4, 2011

Intertidal Embroidery Project - WIP

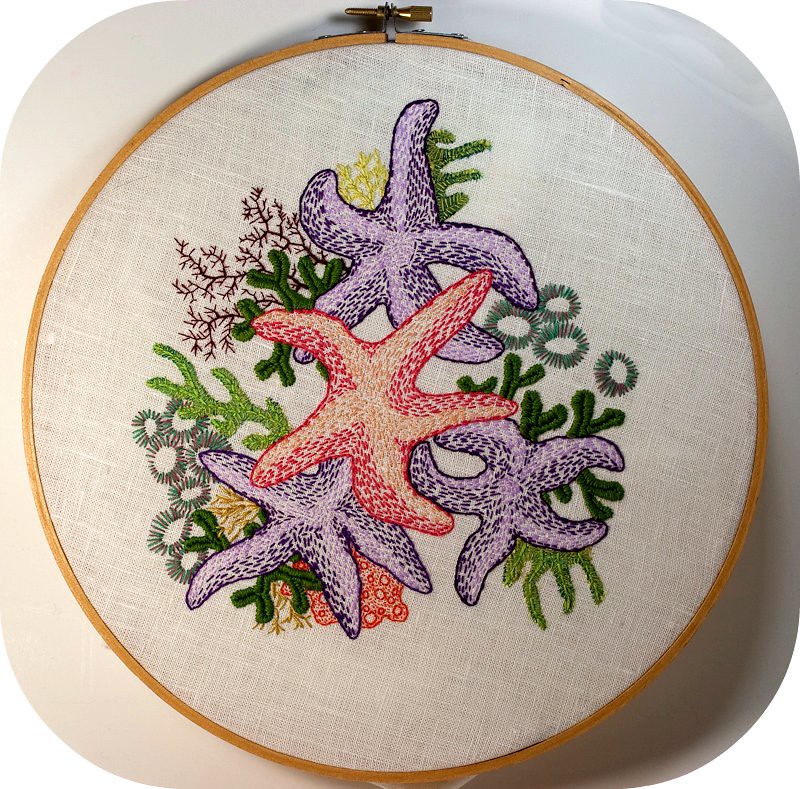
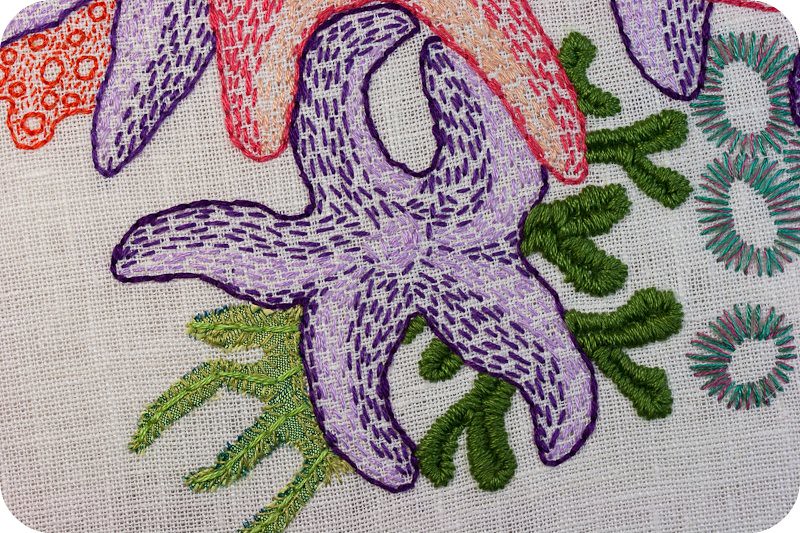
I have been working for a while now on an embroidery piece inspired by the tidepools surrounding the rocky beaches of Southern Vancouver Island. It isn't really a finished work, I feel like it is more of an embroidered sketchbook for a future project. I am using cotton embroidery thread on white linen, with a little silk applique. Above is a Purple Ochre Star, which is the most common starfish where I live. Depending on what part of the coast you live on, Ochre Stars will vary in colour from the deepest purple, to bright pink and orange. The purple variety is the most common here, but in every large pool there are a few salmon pink sea stars too.

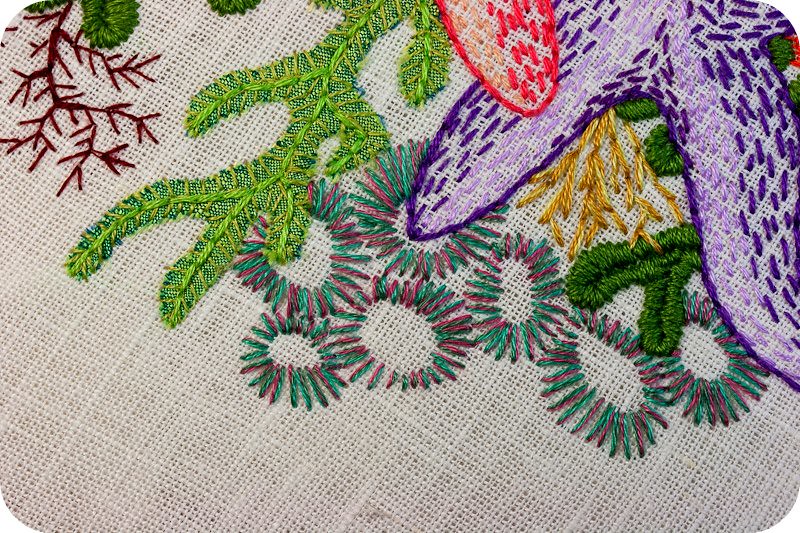
One of my favourite things are the sea anemonies. Even though my first instinct is to make things really challenging and complicated, I am always most impressed with artists that are able to use very simple shapes and effortless looking styles to say more. I wanted to show the way the anemonies aggregate and squish together without being too fussy. I really am in love with their irregular oval shapes, made with just radiating straight stitches.
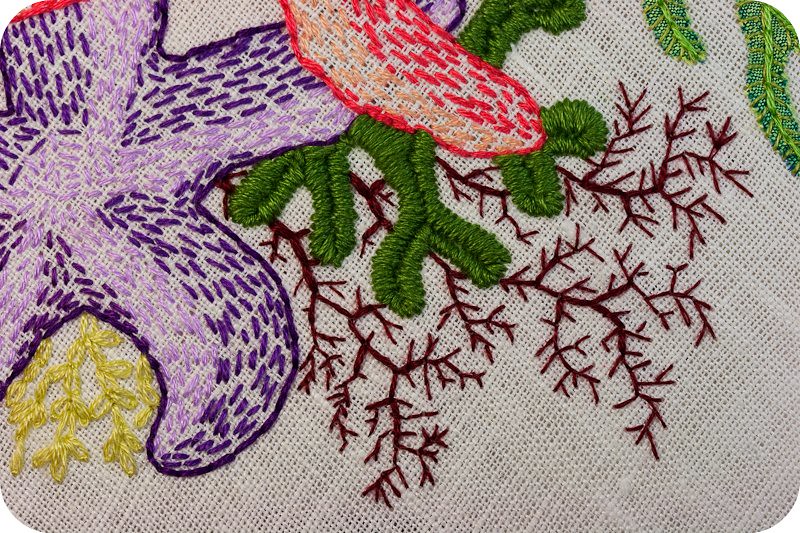
I added some bright green silk applique and heavy satin stitching to make green algae. I also really like the feathery red algae, and it is very easy to get carried away sewing the branching fronds with finer and finer thread.

I am still trying to figure out the best way to make embroidered barnacles. I think that they would look best done in white or light grey on a darker background like navy blue. I would love to see all their angular shapes, like living prisms, feeding with their feathery appendages.

The part of this project that has me stuck is how to execute the embroidery composition so that it looks modern, unfussy and striking. What I have right now is a jumble of things tangled together, which is how they live in real tidepools, but in my opinion is not the most effective presentation. I think that embroidery can be a very modern feeling medium, but you have to be careful with its treatment to do so. I really want to be sure that this project doesn't tread into stuffy "embroidery sampler" territory.
I am thinking about making 3 or 4 small pieces, each with only one or maybe two different species, but linked by style or by how they are framed. I think it might be make them feel more modern to frame them simply in their hoops. What do you think?

Monday, January 17, 2011

Green Felt Bird

 
I really love birds. I think this came from my Mom, who took me on a lot of nature walks as a kid, made beautiful feeders and birdhouses for our yard and always took the time to point out the different species we saw and how she identified each one. She is also a very talented artist and carver, and filled our home with gorgeous, and sometimes quirky, wooden birds.

Lately, I have found a lot of other crafty and artistic people who find inspiration in the beautiful shapes and colours of birds. One such person is Geninne, from Geninne's Art Blog, who paints the most stunning and vivid watercolours. Her work is very modern, filled with colour, and every time I visit her blog I feel inspired to get out my paints and practice. If you haven't already stumbled on her, I highly recommend taking a look.

Another blogger whose love of birds inspires me is Abigail Patner Glassenberg, from While She Naps. Abigail is the author of The Artful Bird, a book filled with projects for sewing amazing birds from all sorts of different materials. My little green bird was created using a pattern from this book for a wren. It is made of hand-sewn wool felt, with needle felted and embroidered details, and legs made from craft wire. I really love how it stands on its own two feet! The colours I chose, the bright chartreuse and emerald green, were inspired by the fearless use of colour in Geninne's paintings.
This little bird is for you Mom!

Tuesday, January 11, 2011

Felt Owl Measuring Tape + Free PDF Pattern

OK Internet, as promised, an owl craft made just for you! You can download a PDF pattern for this little Owl at the bottom of the page.

I have been stuck in bed this week, hit hard with the worst cold I think I have ever had. So if you want to try this at home, it is so easy it can be done under the covers, on a lap tray, while drinking tea and hunting for a good movie on Netflix. I just hope your partner doesn't mind little bits of felt and fluff in the bed!

I made this little owl out of some of my wool felt scraps and a tiny Japanese measuring tape which I had picked up ages ago at my favourite local fabric store, Gala Fabrics. Our little owl friend is hand sewn and embroidered with cotton embroidery threads, and stuffed, along with the measuring tape, with a little polyester fiberfill and some quilt batting. It is hard to see in the pictures, but the tape has a pull tab which comes out just behind the owls wing. If you don't have a tiny tape measure, you can still make a stuffy version or applique him onto any of your projects for some added cute.
The first step is to decide what colours you like for your owl and cut out all your felt pieces. This took my sick-addled brain a long time, but I finally I chose some of my favourite colours, a soft heather purple and pink with light browns. If you design your own felt animal for this project, notice in the photos below that you need to make the body at least a 1/4" bigger than your tape measure on all sides

Next, sew on the felt features and embroider the body of your owl. I used 3 strands of embroidery floss for most of the decorative stitches, 6 strands of brown for the owl body, and 2 strands to sew down the eyes and beak. I also used a little bit of stuffing in the beak to make it puffy. All my stitching is just simple straight stitches and overcast stitches. If you are not under the influence of a big mug of NeoCitran, you might want to attempt something fancier, but it's not really necessary (I had this idea to cover the back of the owl with lazy-daisy stitch "feathers", but that seemed too exhausting).

Decorate the front of each wing as you like and then sew the wing fronts and backs together with 2 strands thread, adding a little stuffing before closing them up. Stitch together the little toes. I used 1 strand of floss in a fine needle to make sewing the tiny little toes easier.
Cut out two pieces of cotton quilt batting a little smaller than your owl body. I used a little quilt baste spray (yeah, don't do that step in bed!) to attach the batting to the wrong side of each brown body piece. Position your measuring tape button side down, on the back side of your owl body, so that the tab comes out behind where a wing will be. I held the tape in place with a couple of basting stitches which I pulled out when the owl was finished.

I sewed the body together with overcast stitches, starting from the middle of the head and working my way around clockwise. Stuff as you go, both around the edges, and adding a little stuffing on top of the tape.

When you reach a spot to insert wings or feet, tuck them between the two body pieces and make sure your stitches catch all 3 layers as you sew. When you reach the tape measure tab, cut a little slit in the felt so that the tape can move freely (see picture above).

Keep sewing and stuffing until you reach the top of the head again, make a knot and then draw your thread through the owls body. Clip the thread close, the tail will be pulled back into the owls body. Pull out the basting stitches around the measuring tape from the back.
This little owl would be a great gift for a crafty friends sewing box, but a handy little measuring tape in your purse is really useful for thrifty shoppers too! I find carrying a measuring tape to garage sales and thrift stores helps me be sure that one of a kind finds will actually fit and be used in The Tiny Apartment and won't be a waste of money. I also carry a tiny notebook with the measurements of things I hope to find: the height of my chairs, the width of a shelf I could use, yardage for sewing projects, the diameter of the Pyrex lid I am missing, etc...
  
Download the PDF pattern here