
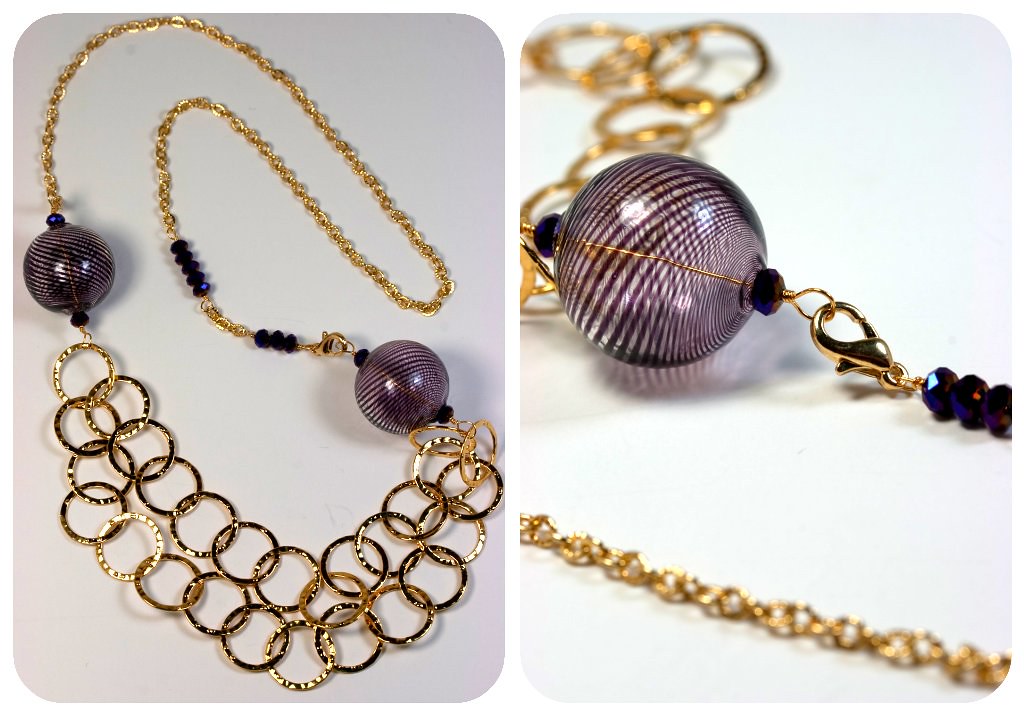
I made this necklace for myself after work this afternoon. I am planning on wearing it to my family Christmas party this year. But it would also be a great last minute gift for a friend who unexpectedly announces they will be visiting at Christmas, or to glam up your little black dress for a New Years Eve outfit. The nice thing about this design is that you can make it quite inexpensively, but it still turns out looking luxurious.
The chain is only a cheap gold coloured base metal, but the hammered links sparkle just the same. You only need 2 larger beads and 12 small beads to finish it off. My favourite colour is purple, so I chose large Italian glass bubbles in a purple spiral, and my smaller beads were faceted dark metallic purple glass. This necklace would look fabulous in any combination of metals and colours. I find I have quite a few larger beads in my craft stash that I bought on impulse because of their colour or shape, but which I later found too heavy for earrings, or too showy to work well with others in a design. If you have anything like that at home, they are perfect for this necklace.
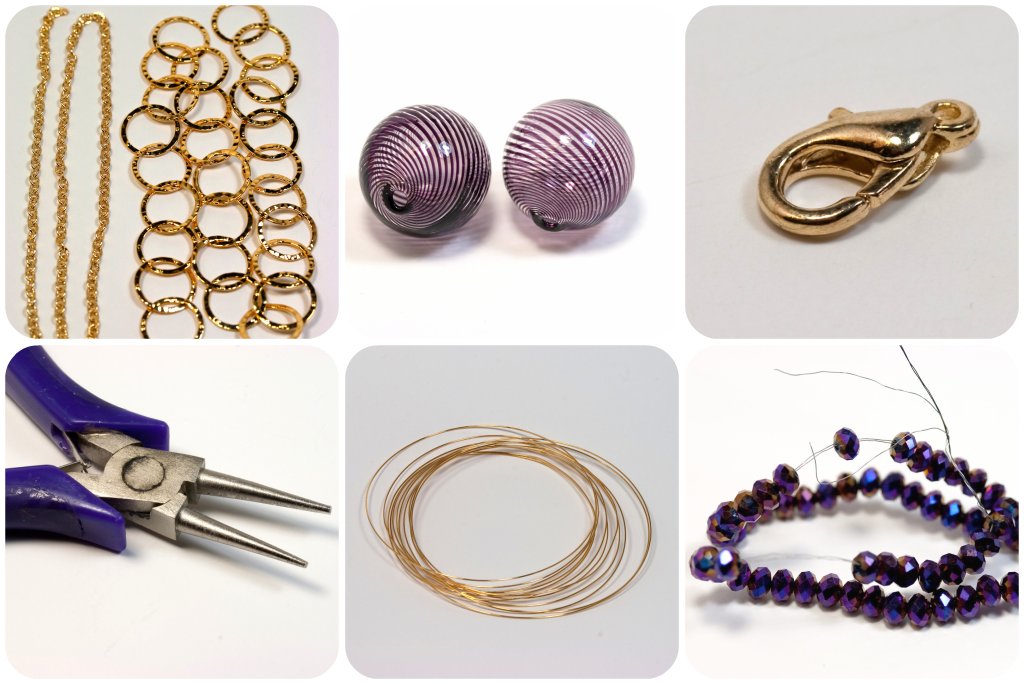
What you need:
- 12" small to medium chain (if you want a very long necklace, you could increase this)
- 12" large hammered chain (or 6" lengths of different chains grouped together)
- 2 large statement beads, something really fabulous from your stash if you have one
- 1 lobster clasp, to match the metal you chose for your chain
- about 8" of wire to match chain, you can use 20 or 22 gauge
- 12 or more coordinating crystals or beads, about the width of the medium chain
- Flat and Round Pliers, Wire Cutters
Instructions:
- Fold the large chain in half and put both ends in a wire loop. Wrap the wire 2 or 3 times.
- Add a statement bead sandwiched between 2 smaller beads on the wire and close with a wrapped loop. This loop will be one end of the necklace.
- Hold up the necklace to find the middle of the large chain, move over at least one link from the center so that the chain hangs nicely. Put this link in a wire loop, wrap wire like you did before.
- Add the second statement bead and two small beads onto this wire and make another loop.
- Pass one end of the small chain into this loop and close the loop with another wrap.
- Make a small wire loop, add the lobster clasp, wrap this loop.
- Add 3 small glass beads to the wire. Make another loop, inserting the other end of the smaller chain. Close this with a wire wrap.
- At this point, go and try on the necklace in a mirror. Decide if you want to make it shorter or longer. If you want it longer, make one or more cuts in the small chain and insert lengths of wire wrapped beads (groups of 1, 3 and 5 look nice). If you want to make it shorter, you can cut out a section of chain and add a shorter length of wire wrapped beads. I added beads to just one side of the necklace because I thought it needed a little asymmetry.
That looks sexy. I want one!
ReplyDeleteThat's a very pretty necklace.
ReplyDeleteMerry Christmas!
Beautiful!!!
ReplyDeleteBeautiful necklace. I like the background info and the clear instructions. Also appreciate how simple it is to make and inexpensive.
ReplyDeleteThanks for sharing this great necklace. I really love the glass beads.
ReplyDeleteI love this necklace! I've included it in my link round-up on the FaveCrafts Blog: http://www.favecraftsblog.com/national-craft-month-jewelry-link-love/
ReplyDeleteWould you like to publish your tutorial on FaveCrafts? Email me if you're interested :)
very nice.
ReplyDeleteVau! Lopulta sain verkkosivuston, josta voin todella saada arvokkaita tietoja tutkimuksestani ja tiedoistani.
ReplyDelete
ReplyDeleteI really liked it. I wanted to leave a note.
ReplyDeleteI was reading your website. Thank you.
ReplyDeleteI also tried to share the site. thank you
ReplyDeleteThis is the best way to share the great article with everyone one.
Thank you for sharing such a thoughtful and well-written post. I found the explanations clear and the overall structure easy to follow. The topic is very relevant, and your perspective added valuable context. This is the kind of content I enjoy bookmarking for future reference.
ReplyDeleteI learned quite a bit from this post. The information was presented in a way that kept my attention from start to finish. I especially liked how you connected the main ideas with practical considerations. Looking forward to seeing your next article on this subject.
ReplyDeleteI really enjoyed reading this article. The way you explained the topic made it easy to understand while still providing enough detail to keep experienced readers engaged. I especially appreciated the practical examples and insights. Looking forward to reading more content like this in the future.
ReplyDeleteThis was an excellent post with a lot of useful information. I liked how the ideas were organized and presented in a clear, logical way. The examples helped reinforce the key points and made the content more relatable. Thank you for taking the time to share your knowledge.
ReplyDeleteGreat article. It is refreshing to find content that balances depth and readability so well. The discussion was informative without being overwhelming, and I came away with several new ideas to think about. I am excited to explore more posts from this blog.
ReplyDelete