

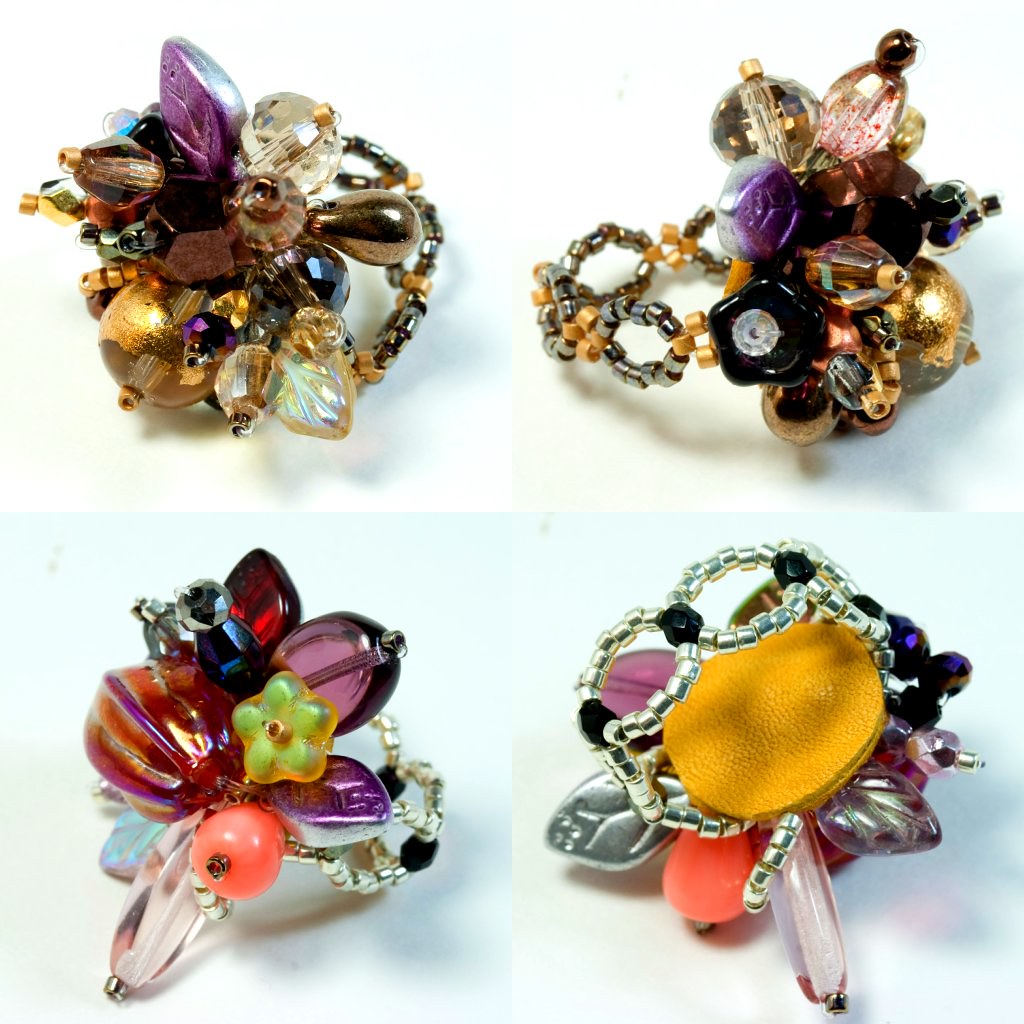
The ring was made by Dancing Leaf Designs and has a mix of vintage beads, pressed glass flowers and leaves, a band of tiny metallic seed beads and a backing of soft leather. This ring design is very comfortable to wear, and for those with metal sensitivities like me, the glass beads of the band won't irritate your skin. I have been wearing it every day and I love it so much that I have been trying to make some more beaded rings of my own. These two are what I have come up with so far:
What you need:
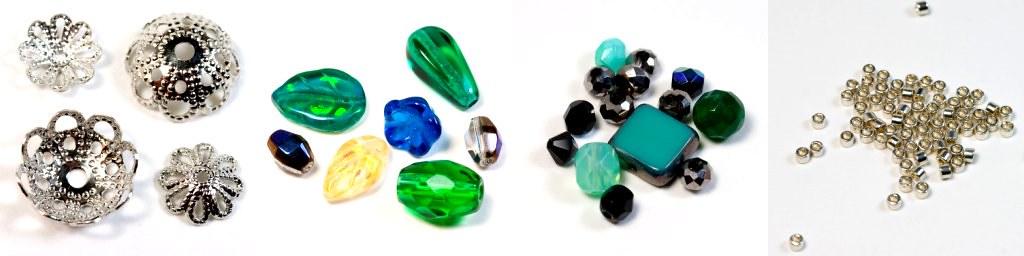
- A metal bead cap (see photos below) with many small holes, to serve as a base for the ring
- Monofilament beading line
- A few large feature beads, with some medium and smaller beads for filler (about 10-20)
- A little pile of seed beads or very small beads for the ring band
- A tiny scrap of leather (or you could probably use vinyl or felt)
- E6000 or other very strong craft glue
1. Start by flattening the bead cap with a pair of flat pliers. I think you may be able to buy a special flat perforated metal disc made just for beaded rings like this and if you can find one, use it instead of a flattened bead cap.
2. Cut about a meter of monofilament line. Insert the two ends of the line into 2 small adjacent holes from the underside and begin beading the band from this spot.
3. Choose whatever beading pattern you like and continue until the band is long enough to fit just a little bit loosely around your finger (you want the band a little loose because the fit will be smaller after you add the leather under the ring base).
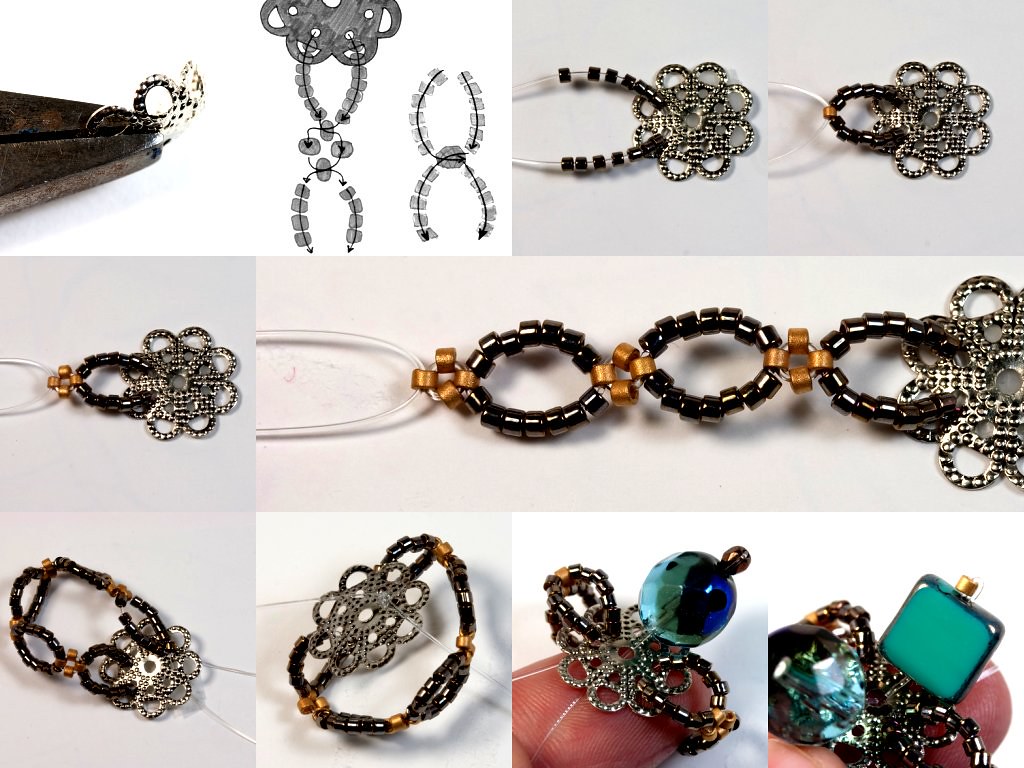
4. Insert the two ends of the line into two small holes opposite where you started the band (be sure there are no twists in the band). Tie the line using a reef knot on the underside of the metal base. Don't trim the excess monofilament lines.
5. Using one of the long ends, begin adding beads to your ring. Go up through the center hole, add your largest bead, followed by a small seed bead. The line then goes around the seed bead and through the large bead again. Feed the line down through the center hole and pull tight. Continue adding beads, working outwards, filling any gaps. The outermost ring of beads can include overhanging leaf shapes, loops of seed beads or your smaller beads stacked like short kebabs. It's a good idea to try it on occasionally to make sure the design looks balanced on your hand.

6. When you are happy with your ring, pass the monofilament lines to the underside of the ring and tie together with another reef knot. Trim the ends short. Cut a small circle of leather to fit under the flattened bead cap. Coat the sueded side of the leather with E6000 glue and firmly attach to the inside of your ring. Let the glue set according to directions before wearing.
Tadaa! A sparkly and impressive looking ring you made yourself! Good for you!

I knew it wouldn't take you long to figure out how to make your own ring!
ReplyDelete;)
Wow very pretty and majorly impressive!! - The relatively small amount of patience and concentration I'm able to harbor would probably be barely enough to get me to string just 2 of those tiny seed beads lol! So kudos to ya, girlfriend!
ReplyDeleteWe have featured your designs at http://www.handmade-jewelry-club.com/2011/05/free-tutorials-for-beadweaved-rings.html
ReplyDeleteTake a look.
Thanks!
Jane
http://www.handmade-jewelry-club.com/
I like the little trick with the flattening the bead cap... never tought about... thanks for sharing
ReplyDeleteRenata
http://beadingcrafting.blogspot.com/
I've just came across your "The Golden Snitch! Ornament Tutorial" and liked it very much so I took some time to explore your blog. Nice artwork, very clever and unique design. Looking forward reading upcoming posts. Happy Holidays :)
ReplyDeleteBeautiful! I have never done anything like this and I am looking forward to trying this. Thank You for posting.
ReplyDeleteGood luck giving this a try Kelli! I found the hardest part was picking which beads to use, I am suck a magpie for shiny things :) It wasn't that difficult and I still wear them often. Be sure that the leather backing you use is a light colour, as I have found that some of the recycled leather I use can bleed dye into your finger!
ReplyDeleteThank you so very much for sharing this tutorial with us! I am going to go try this Today, I am so excited! Awesomeness ;)
ReplyDeleteI just love this!!!
ReplyDeletekuşadası
ReplyDeletemilas
çeşme
bağcılar
siirt
571R
Harika wordpress blog burada.. Bu günlerde sizinki gibi kaliteli yazı bulmak zor.
ReplyDeleteCool and I have a neat offer: Who Repairs House Windows house interior renovation
ReplyDeleteI love how unique this beaded ring is.
ReplyDelete
ReplyDeleteThis is really helpful post and very informative there is no doubt about it.
ReplyDeleteEveryone an extremely breathtaking chance to read from this blog.
ReplyDeleteNice post. I learn something totally new and challenging on blogs.
ReplyDeleteThank you for the good information you share with us.
ReplyDeleteI am satisfied that you simply shared this useful info with us.