Showing posts with label felt. Show all posts

Saturday, March 5, 2011

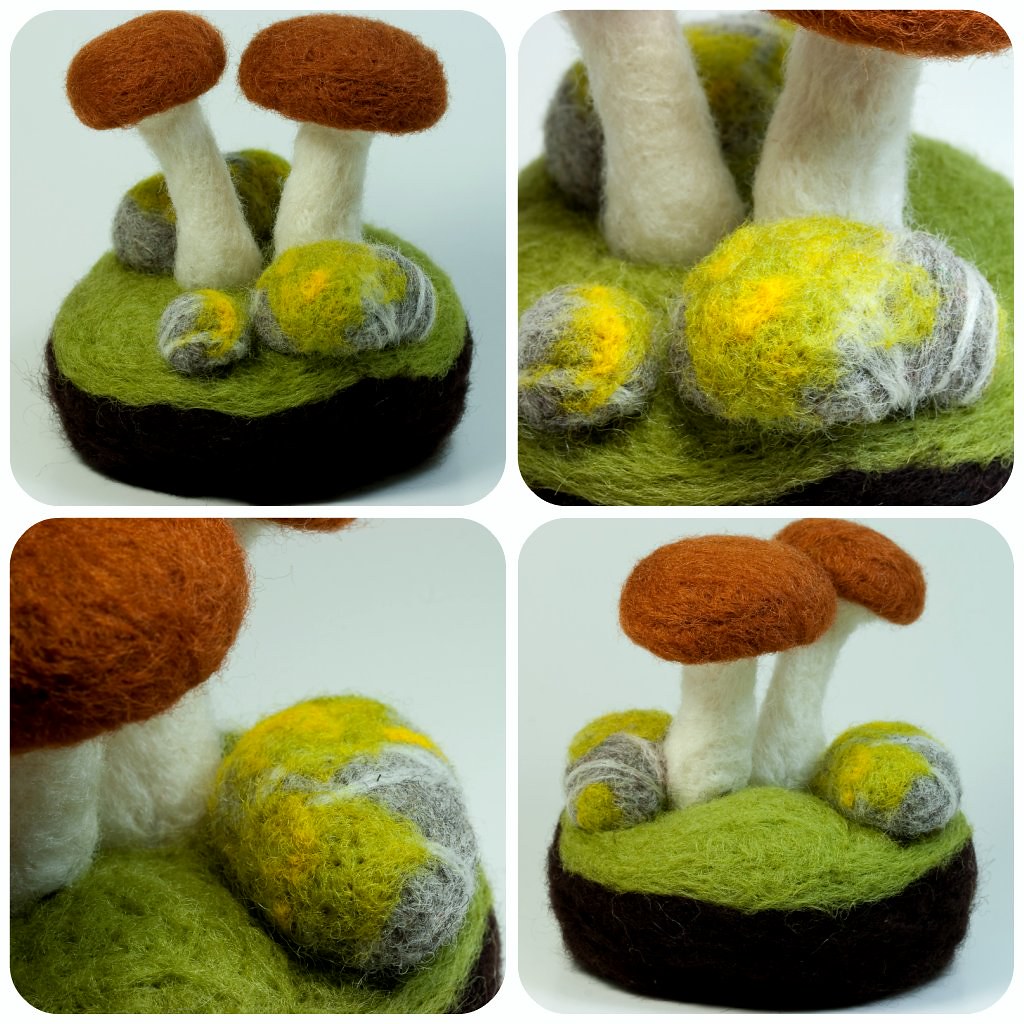
Felted Brown Mushrooms and Lichen Covered Rocks

I am working on another small terrarium. The inspiration for this one comes from hiking in the dry open forests of the Gulf Islands. There is not a lot of rainfall in the summer and the forest floor is covered with moss and beautiful lichens. When the first real rain comes in the fall we go on mushrooming expeditions. My favourite wild mushrooms to eat are the Chanterelles, but the smooth rusty brown-capped Bolete mushrooms are always exciting to find. If you would like to try making these little brown mushrooms, check out my needlefelted mushroom tuturial!

My favourite mushrooming field guide is All That The Rain Promises and More... by David Arora. The book is small enough to fit into your jacket pocket, is filled with wonderful photos, and is really easy to use. The best thing is that while it is not a complete compendium of every mushroom species known to man, it has all the really tasty mushrooms you want to look for, and very carefully compares and contrasts these with any local mushroom "lookalikes" which are actually poisonous. The book is also filled with hilarious stories, interesting recipes and poems. It is very unique and I think it appeals to the quirky people who run about the woods on their hands and knees searching for elusive and delicious fungi.

I know that fall is long way away, but don't forget that those elusive Morels come up in the spring! 

**If you have never been mushrooming before, it is wise to go with a more experienced buddy, or join a local mycology society. I have been hunting mushrooms since I was a child but if I am ever less than 100% sure of my identification, I leave it behind.

Sunday, February 27, 2011

"Shoelace" Stitch - mini handsewing tutorial

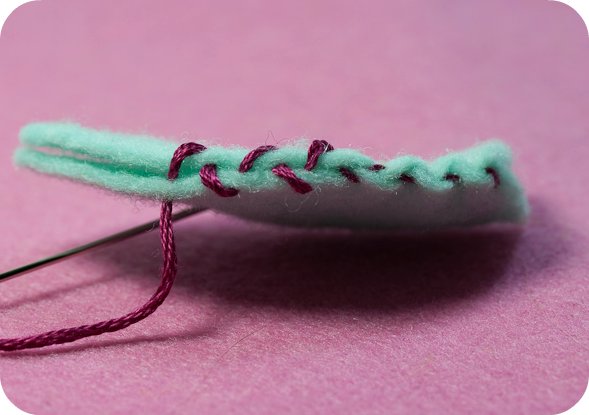
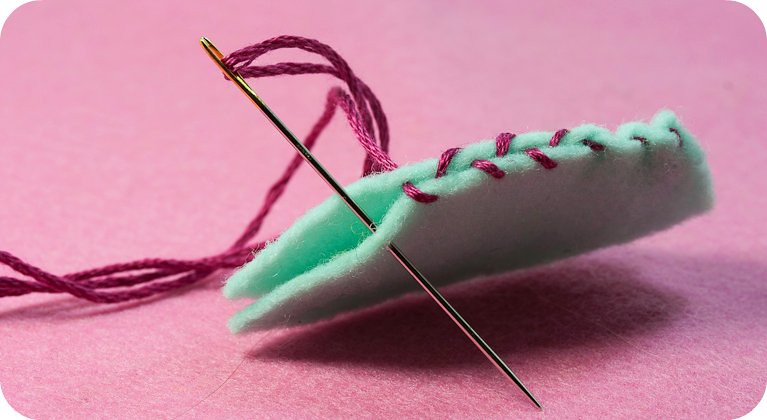
I decided I could do a better job explaining the handsewing technique that I was trying to tell you about in my last post so here is a little mini-tutorial in case you would like to try it. In my example above I have used a contrasting 6 stranded embroidery thread just so everything shows up nicely. You would want to use a closely matching, strong sewing thread in your real work.

As you can see above, the needle is inserted into the felt from the inside of the seam into one side and then from the inside of the seam to the other side, each time moving forwards a few millimeters and alternating directions. When you pull the thread tight the stitches bite into the felt and become almost invisible. I tend to sew about a half of an inch or so and then pull the thread tight, then sew another half inch, tightening my stitches as I go. Below you can see the untightened stitches on the left, and on the right are stitches which have been pulled tight.
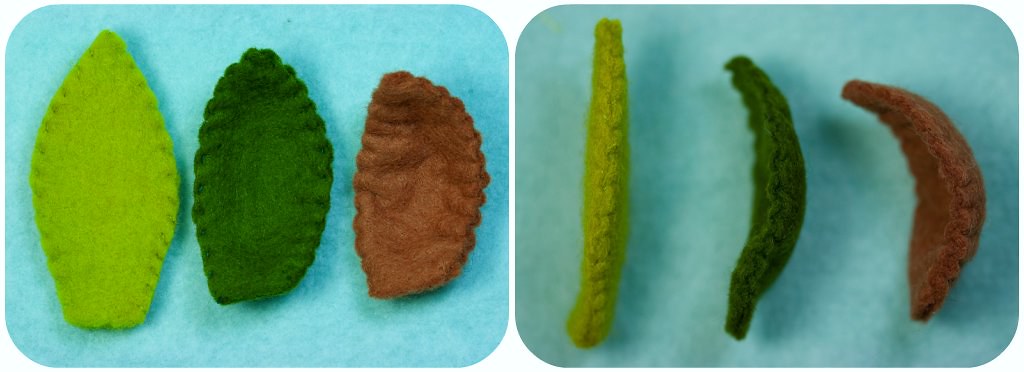
Gently pulling the stitches will result in leaves that look slightly notched. Pull the thread tighter, and you get distinctly notched leaves that curve outwards. Pull very tight, more on one side of a leaf than the other, and you get leaves that twist and bend (pull the thread too tight, and it will snap and you will have to stomp your feet and start over). It is a great way to add simple three dimensional shape to a plant. Also, the thread seems to disappear into the felt, but without crushing the outer shape the way that blanket or overcast stitches seem to do when they are pulled tightly. To help shape the leaf the way you want, sometimes you can take the leaf and tug on the shape slightly to redistribute the gathers you have made.
 
 Above are three leaves that I have stitched using this technique. Each leaf started exactly the same shape and size. By tightening and gathering the stitches you are able to make progressively more curved leaves. If you find that you aren't able to tighten the stitches easily and want a more curved leaf, you might have to try spacing your stitches out a little more.

You could use leaves like this to build your own succulent felt plant, or you could pair a leaf with a felt flower to make a pretty pin or clip. If anybody knows the real name for this stitch I would love to find out. 

Friday, February 25, 2011

Needle Felted Succulent Terrarium

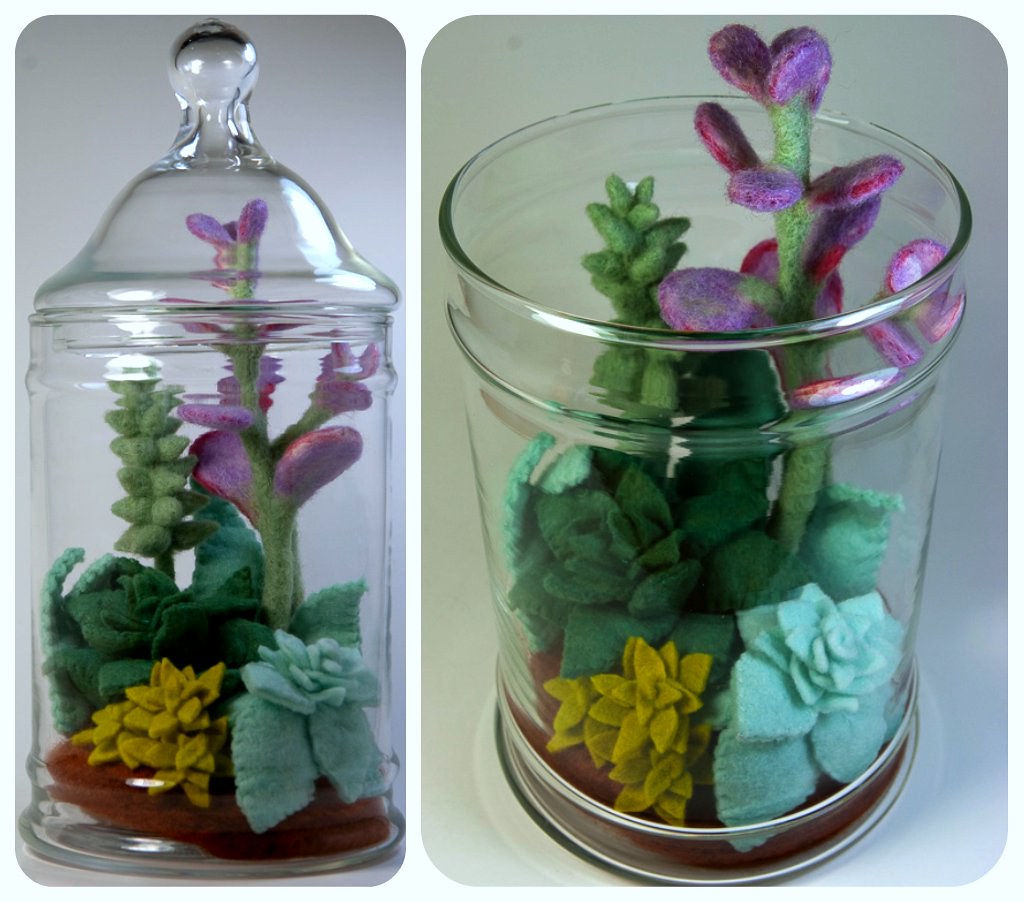
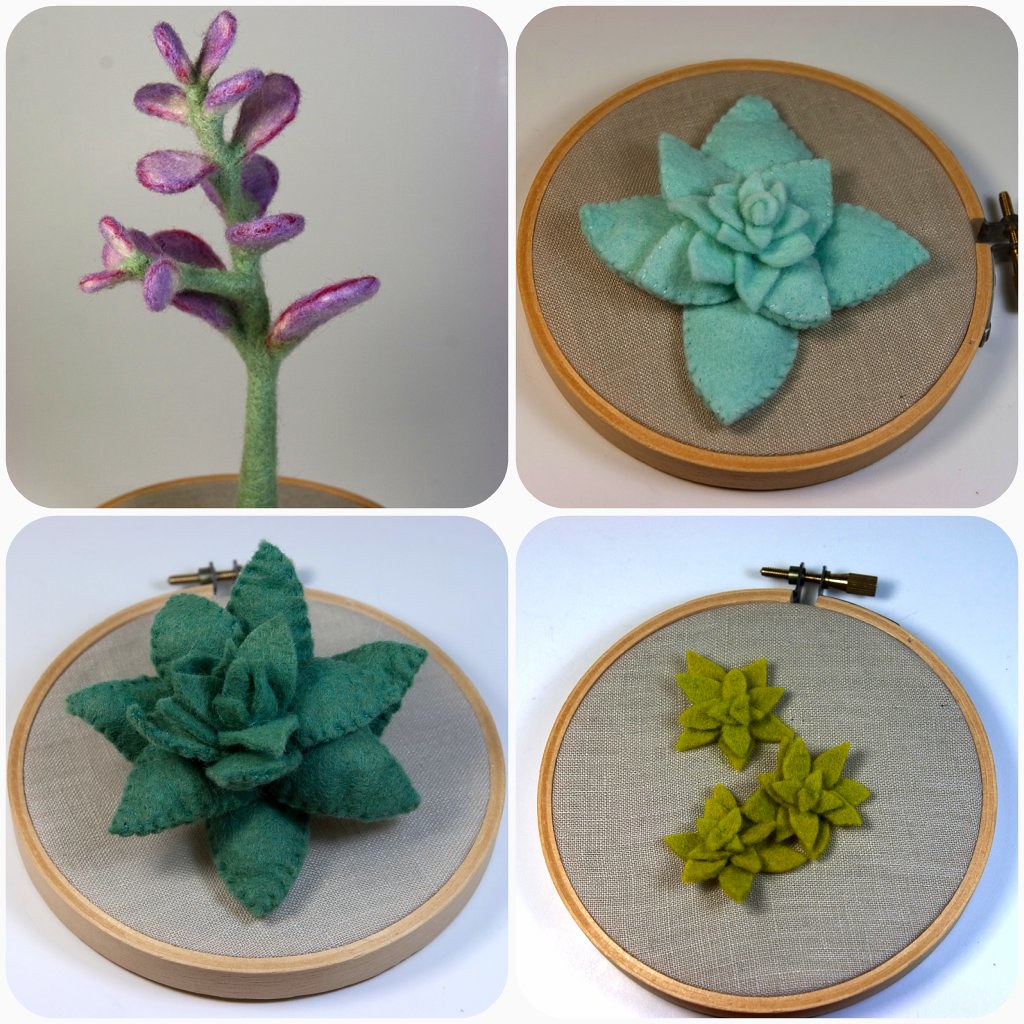
Ever since I made my first felt terrarium I have searching my local thrift stores for the perfect glass containers so I can make some more. This week scroungers luck was with me and I now have 4 glass terrariums waiting to be turned into special little microcosms! It is snowing outside and I am thinking of summer, so I decided to make my terrarium out of felted versions of sun-loving succulents. I love the colours and shapes and I wish I had a patio where I could expand my collection - have you seen Geninne's? I am so jealous.

Succulents really lend themselves to being made from felt because their leaves have a natural "plush" look to them and the wool seems to take on their soft palette of greens and blues easily.

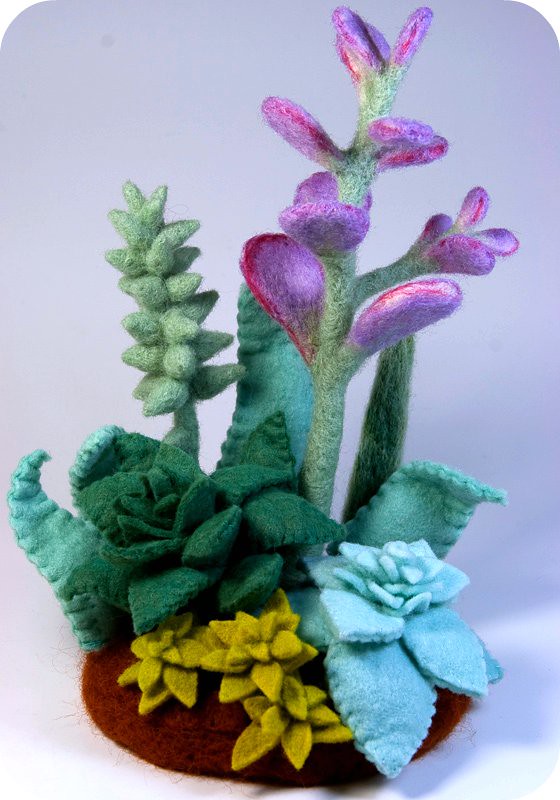
Because the beautiful colours of these plants was such a big part of my inspiration, I have to admit to being really fussy about colour with this project. I hand-dyed the sheets of wool felt, starting with either cream or white, to get different grades of blue-greens. To achieve the yellow-green of the tiny filler plants in the front of the terrarium I over-dyed very light blue-green felt with natural turmeric (handy tutorial from Lion Brand for dying wool with turmeric). For the jade plant, I layered wisps of wool roving in white, light green, bright magenta and soft lavender, in order to get the leaves just right.

I knew I would have to make some tall succulent plants in order to make my terrarium look full. I decided that I would start with a jade plant, as I had a real plant in my living room to study. After searching the internet, I think I may actually be the first person crazy enough to needle-felt a jade plant. Trust me to make an everlasting version of a plant that already is drought resistant and impossible to kill! It is made with a pipe cleaner armature. I needle-felted a smooth stalk and smaller side branch around the pipe cleaner in light green wool. The leaves were attached to the stalk, alternating directions with each pair. Oh, did I mention, I also stabbed myself about a hundred times? I need to figure out a better way to felt the edges of thin leaves that doesn't involve sandwiching my barbed needle between my fingers.
The "Hens and Chicks" type succulents were made almost the way you would make a rose. I started with a small cone of needle felted wool, and then built the plant around this, starting with the smallest leaves and adding larger and larger leaves. The outermost layers are not only double felt, but stuffed with wool roving. I also made a second tall succulent with many cone-shaped leaves, some tiny filler plants, as well as some large curling leaves that I used for the background. Everything was arranged and sewn down to a terracotta-coloured needle felted base.

I also discovered a new (probably only new to me) stitch for sewing together two layers of felt; I am going to call it "Shoelace" stitch, because that is how I sew it.
**Update: I have moved the description for the Shoelace stitch to its own mini-tutorial here.

Wednesday, January 26, 2011

Year of the Rabbit Sewing Kit

 
Have you heard 2011 is the Year of the Rabbit? That sounds good to me; rabbits have always been associated with luck, so I hope this will be a lucky year. Rabbits are also symbols of the coming spring, and I am pretty sick of blah winter rains and no sunshine.

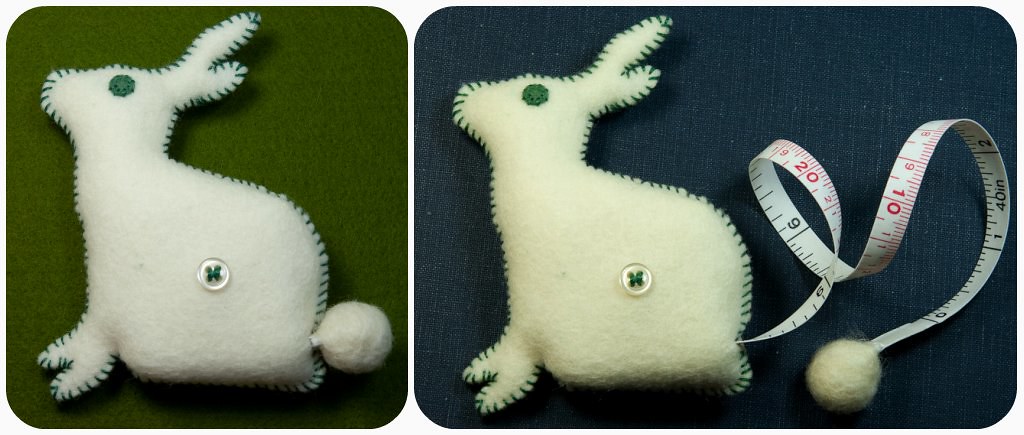
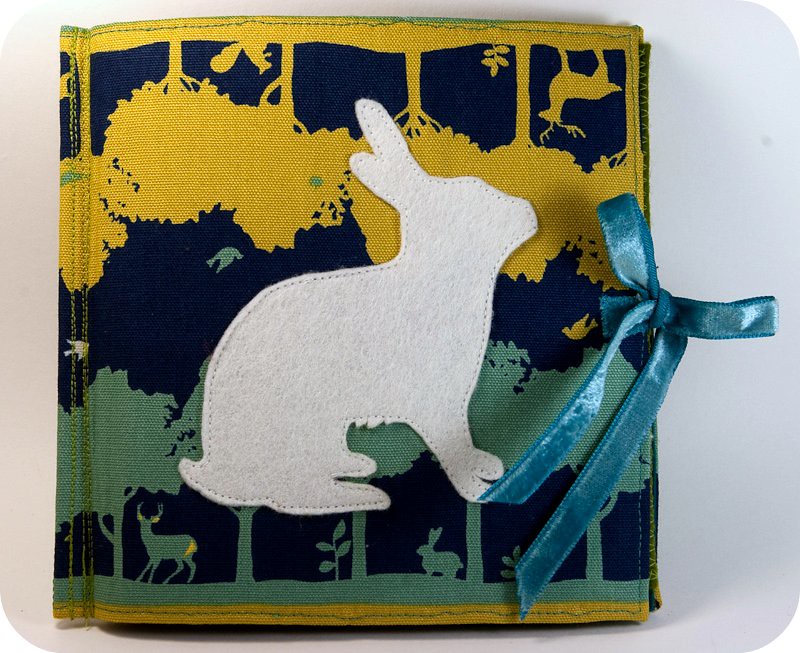
I wanted to make a little "extra present" for my sister, who just had a birthday, but has been studying hard and deserves a little extra something just for being herself. As she and I both have a fondness for cute little woodland animals, I decided to make her gift rabbit-themed, to go with the new year, and lucky, sunny wishes. I made her a cute little sewing kit, including a needle book, a white rabbit measuring tape, and a little needle felted rabbit teacup pincushion. 
 
The tail of the white rabbit measuring tape is a ball of needle felted cream wool, which also serves as the pull tab for the measuring tape. I used a tiny shell button in the center of the rabbit to trigger the mechanism for retracting the tape. I decided to keep the design simple and not include any details in the rabbit except for a green eye. The rabbit body was made in much the same way as my owl tape measure.
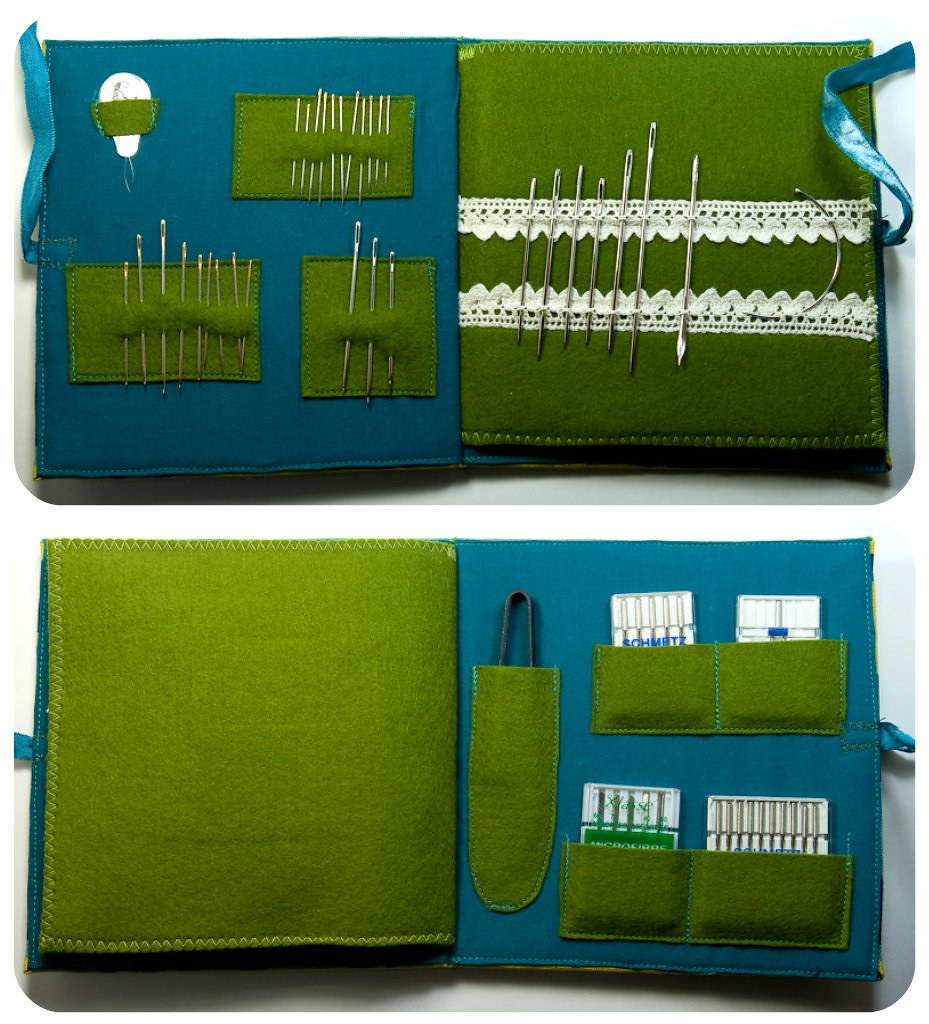
The needle book is 6" square, with one center page. I fused Timtex between the layers of fabric and felt to make the books cover very rigid (more "book-like" than most fabric books). On the inside, I used little panels of felt to separate each type of needle. There are also some pockets for holding sewing machine needles, a needle threader, and a pair of Japanese thread snips. I found a little piece of vintage velvet ribbon use as the tie. For the heavy needles, I sewed down two rows of a Japanese crochet cotton lace I purchased from Daiso in Vancouver; the larger needles can thread easily through the holes in the lace.

Here is the inside of the needle book: 
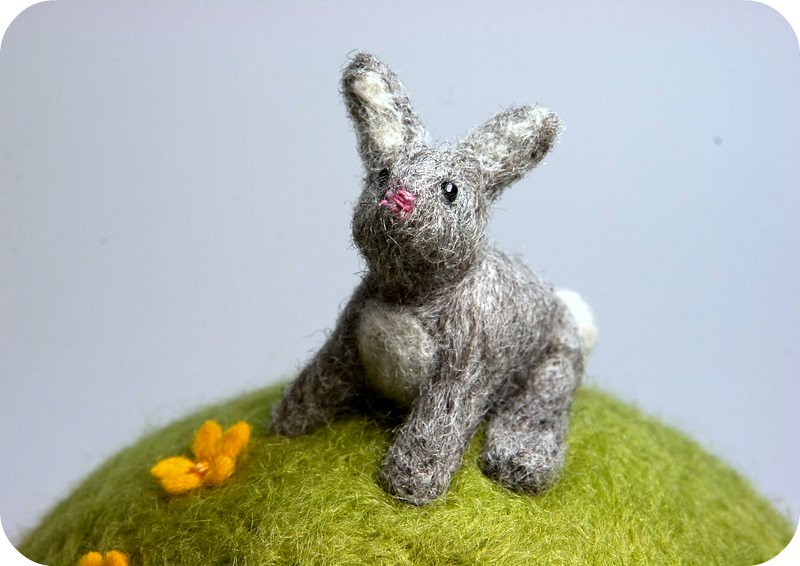
The pin cushion was the most fun of the three little projects to make. I really love needle felting. It feels like magic crafting. Before I tried it, I didn't know what all the fuss was about, but now it is my favourite thing to do late at night. My rabbit is made of grey and white felt wool, his eyes are black seed beads and his nose is a few stitches with pink embroidery thread.  I really like the expression on the little grey bunny. He looks like he was disturbed from his lunch of felt buttercups by a nosey crafter, and he is just waiting for me to look away so he can go about his business.

There are a lot of other teacup pincushions out there. The first time I saw the beautiful little worlds in a teacup made by Mimi Kirchner, I knew I wanted to try to make one. My teacup is like a very simple version of the beautiful scenes she creates.

Happy Chinese New Year!

Monday, January 17, 2011

Green Felt Bird

 
I really love birds. I think this came from my Mom, who took me on a lot of nature walks as a kid, made beautiful feeders and birdhouses for our yard and always took the time to point out the different species we saw and how she identified each one. She is also a very talented artist and carver, and filled our home with gorgeous, and sometimes quirky, wooden birds.

Lately, I have found a lot of other crafty and artistic people who find inspiration in the beautiful shapes and colours of birds. One such person is Geninne, from Geninne's Art Blog, who paints the most stunning and vivid watercolours. Her work is very modern, filled with colour, and every time I visit her blog I feel inspired to get out my paints and practice. If you haven't already stumbled on her, I highly recommend taking a look.

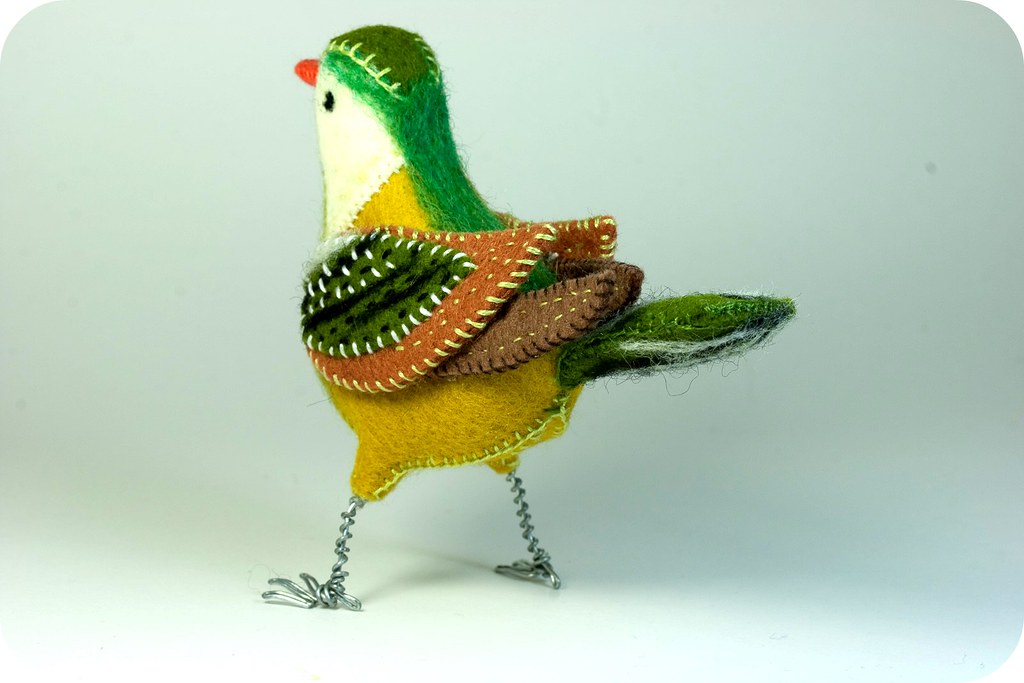
Another blogger whose love of birds inspires me is Abigail Patner Glassenberg, from While She Naps. Abigail is the author of The Artful Bird, a book filled with projects for sewing amazing birds from all sorts of different materials. My little green bird was created using a pattern from this book for a wren. It is made of hand-sewn wool felt, with needle felted and embroidered details, and legs made from craft wire. I really love how it stands on its own two feet! The colours I chose, the bright chartreuse and emerald green, were inspired by the fearless use of colour in Geninne's paintings.
This little bird is for you Mom!

Friday, January 14, 2011

First Craft Book Challenge Project: Palm-Size Softies

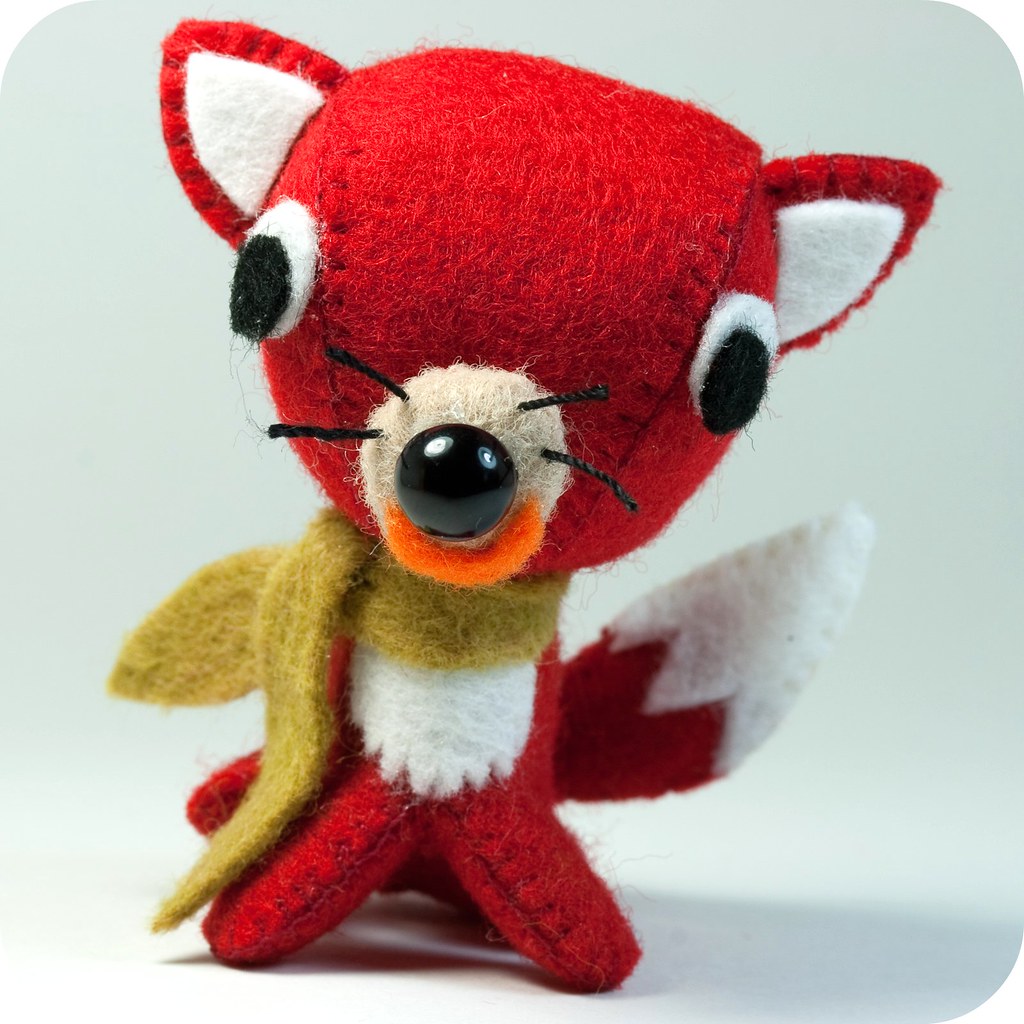
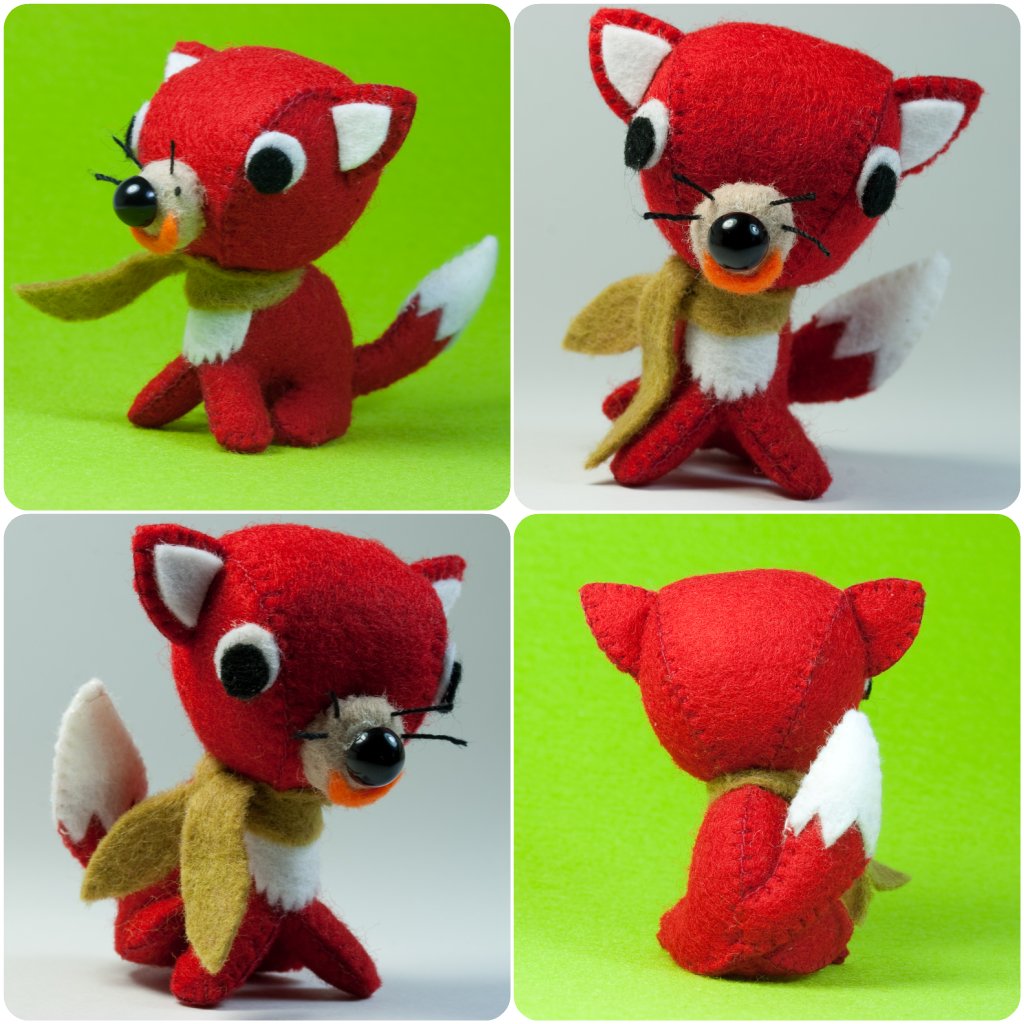
As I was going through my craft books at the start of this challenge I found an alarming number of knitting and crochet books bought when I first tried learning to knit and was convinced I was going to be amazing at it. Turns out not so much. So this year it looks like I am going to have to try my hand at knitting and crochet again in order to keep this challenge going! But for now, I am going to stick with what I love, and what I really love at the moment is sewing things out of felt. I made this tiny little red fox as my first project in the Craft Book Challenge.  

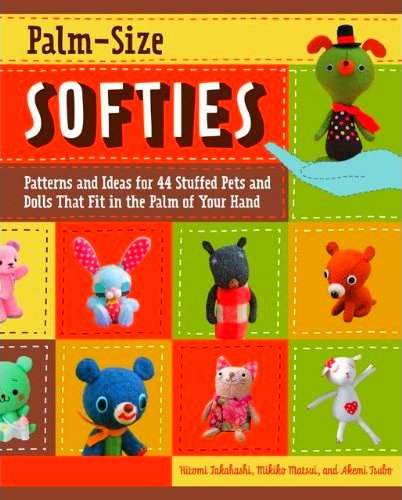
Palm-Size Softies, by Hitomi Takahashi, Mikiko Matsui and Akemi Tsubo, is actually my newest craft book, purchased just before Christmas as a little present to myself. The projects in here are so adorable, I will probably be making most of them. Below is a picture from the book of "Mimi", the pattern I used. She is actually a pet for one of the other softies in the book, so she is really really tiny! I altered the tail a little bit, and added white patches to the ears and chest to make a little red fox instead of a little cat.
This pattern was my first time sewing a gusset into a stuffed animal but the book has great cartoon-like illustrations explaining each step and it was easy to figure out. Abigail over at While She Naps is writing a great series of tutorials on making soft toys and has just made a post all about gussets in soft toys. If you are interested in learning more about making or designing your own soft toys you should really check it out!

I have yet to name this little guy, but here he is, in all his various foxy poses: 
I think the scarf really adds that little je ne sais quoi. You can see just how small he really is when he stands beside some little spools of thread!
Are you participating in the Craft Book Challenge? It's not too late to make something for January! Click the button in my sidebar if you are interested in joining in on the fun.

Tuesday, January 11, 2011

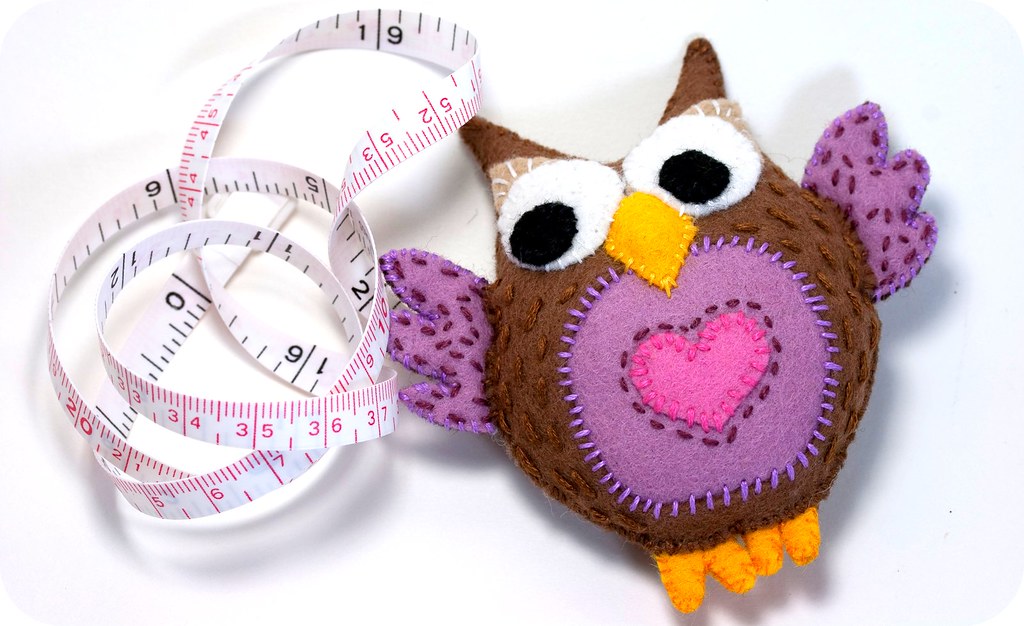
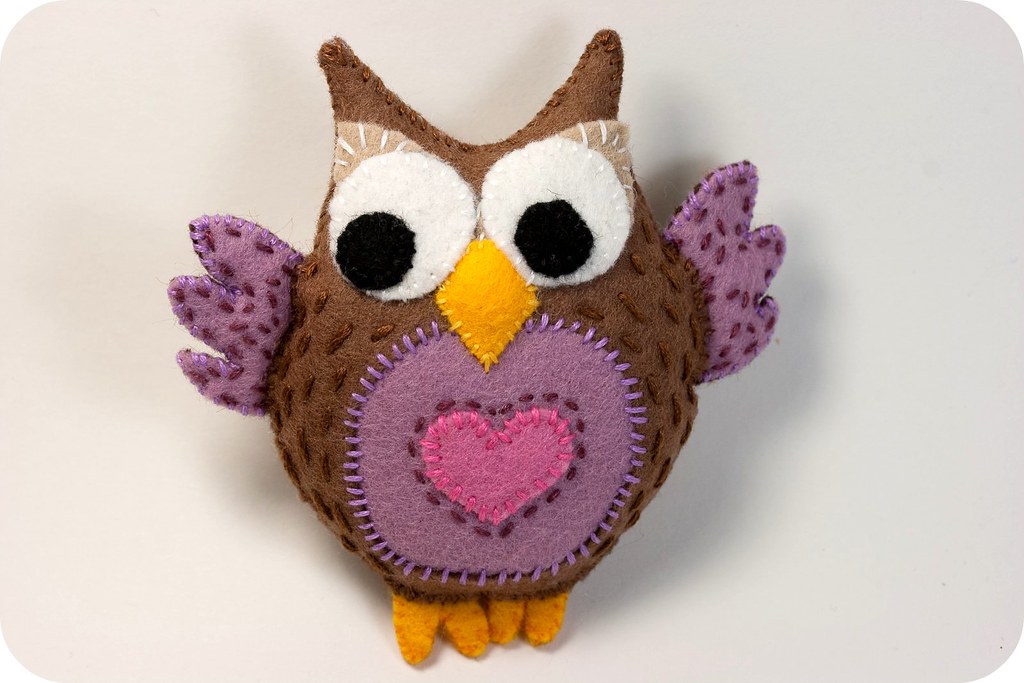
Felt Owl Measuring Tape + Free PDF Pattern

OK Internet, as promised, an owl craft made just for you! You can download a PDF pattern for this little Owl at the bottom of the page.

I have been stuck in bed this week, hit hard with the worst cold I think I have ever had. So if you want to try this at home, it is so easy it can be done under the covers, on a lap tray, while drinking tea and hunting for a good movie on Netflix. I just hope your partner doesn't mind little bits of felt and fluff in the bed!

I made this little owl out of some of my wool felt scraps and a tiny Japanese measuring tape which I had picked up ages ago at my favourite local fabric store, Gala Fabrics. Our little owl friend is hand sewn and embroidered with cotton embroidery threads, and stuffed, along with the measuring tape, with a little polyester fiberfill and some quilt batting. It is hard to see in the pictures, but the tape has a pull tab which comes out just behind the owls wing. If you don't have a tiny tape measure, you can still make a stuffy version or applique him onto any of your projects for some added cute.
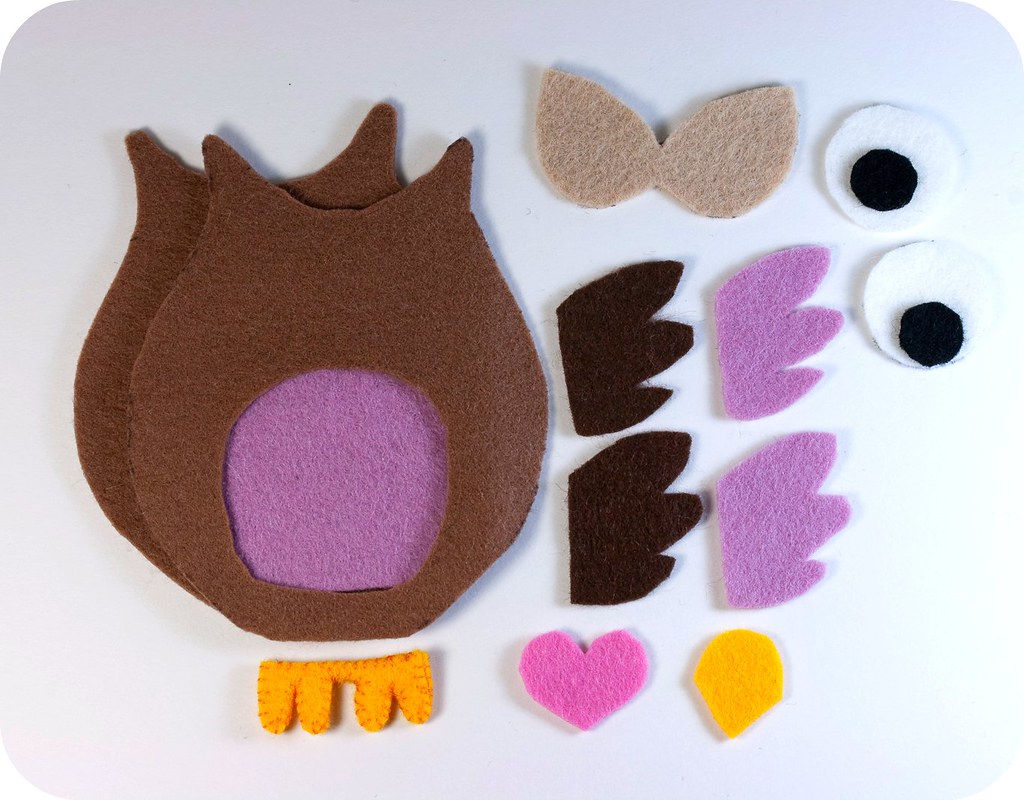
The first step is to decide what colours you like for your owl and cut out all your felt pieces. This took my sick-addled brain a long time, but I finally I chose some of my favourite colours, a soft heather purple and pink with light browns. If you design your own felt animal for this project, notice in the photos below that you need to make the body at least a 1/4" bigger than your tape measure on all sides

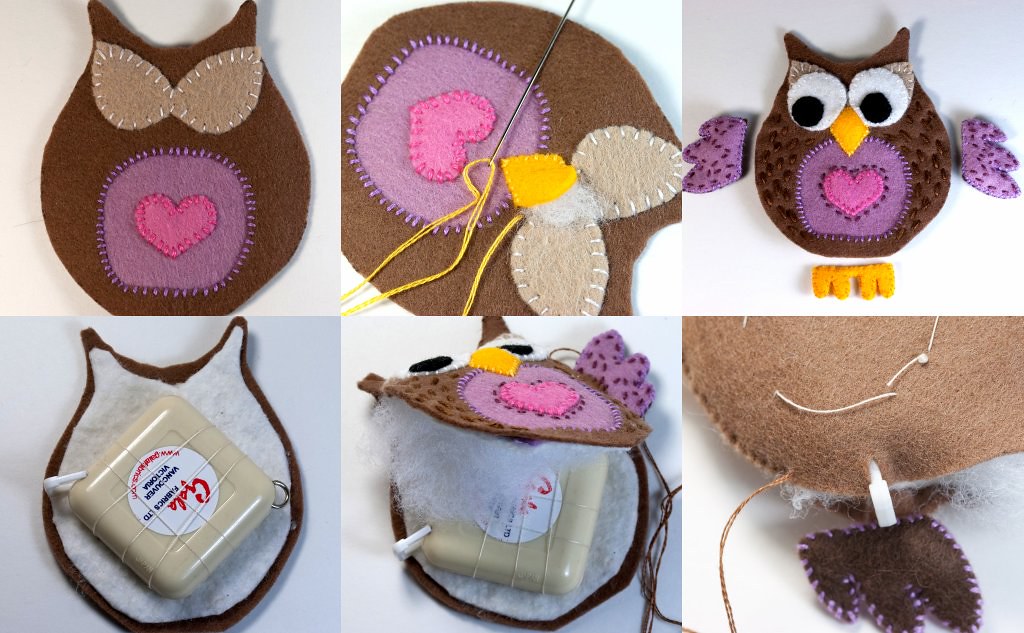
Next, sew on the felt features and embroider the body of your owl. I used 3 strands of embroidery floss for most of the decorative stitches, 6 strands of brown for the owl body, and 2 strands to sew down the eyes and beak. I also used a little bit of stuffing in the beak to make it puffy. All my stitching is just simple straight stitches and overcast stitches. If you are not under the influence of a big mug of NeoCitran, you might want to attempt something fancier, but it's not really necessary (I had this idea to cover the back of the owl with lazy-daisy stitch "feathers", but that seemed too exhausting).

Decorate the front of each wing as you like and then sew the wing fronts and backs together with 2 strands thread, adding a little stuffing before closing them up. Stitch together the little toes. I used 1 strand of floss in a fine needle to make sewing the tiny little toes easier.
Cut out two pieces of cotton quilt batting a little smaller than your owl body. I used a little quilt baste spray (yeah, don't do that step in bed!) to attach the batting to the wrong side of each brown body piece. Position your measuring tape button side down, on the back side of your owl body, so that the tab comes out behind where a wing will be. I held the tape in place with a couple of basting stitches which I pulled out when the owl was finished.

I sewed the body together with overcast stitches, starting from the middle of the head and working my way around clockwise. Stuff as you go, both around the edges, and adding a little stuffing on top of the tape.

When you reach a spot to insert wings or feet, tuck them between the two body pieces and make sure your stitches catch all 3 layers as you sew. When you reach the tape measure tab, cut a little slit in the felt so that the tape can move freely (see picture above).

Keep sewing and stuffing until you reach the top of the head again, make a knot and then draw your thread through the owls body. Clip the thread close, the tail will be pulled back into the owls body. Pull out the basting stitches around the measuring tape from the back.
This little owl would be a great gift for a crafty friends sewing box, but a handy little measuring tape in your purse is really useful for thrifty shoppers too! I find carrying a measuring tape to garage sales and thrift stores helps me be sure that one of a kind finds will actually fit and be used in The Tiny Apartment and won't be a waste of money. I also carry a tiny notebook with the measurements of things I hope to find: the height of my chairs, the width of a shelf I could use, yardage for sewing projects, the diameter of the Pyrex lid I am missing, etc...
  
Download the PDF pattern here

Wednesday, December 29, 2010

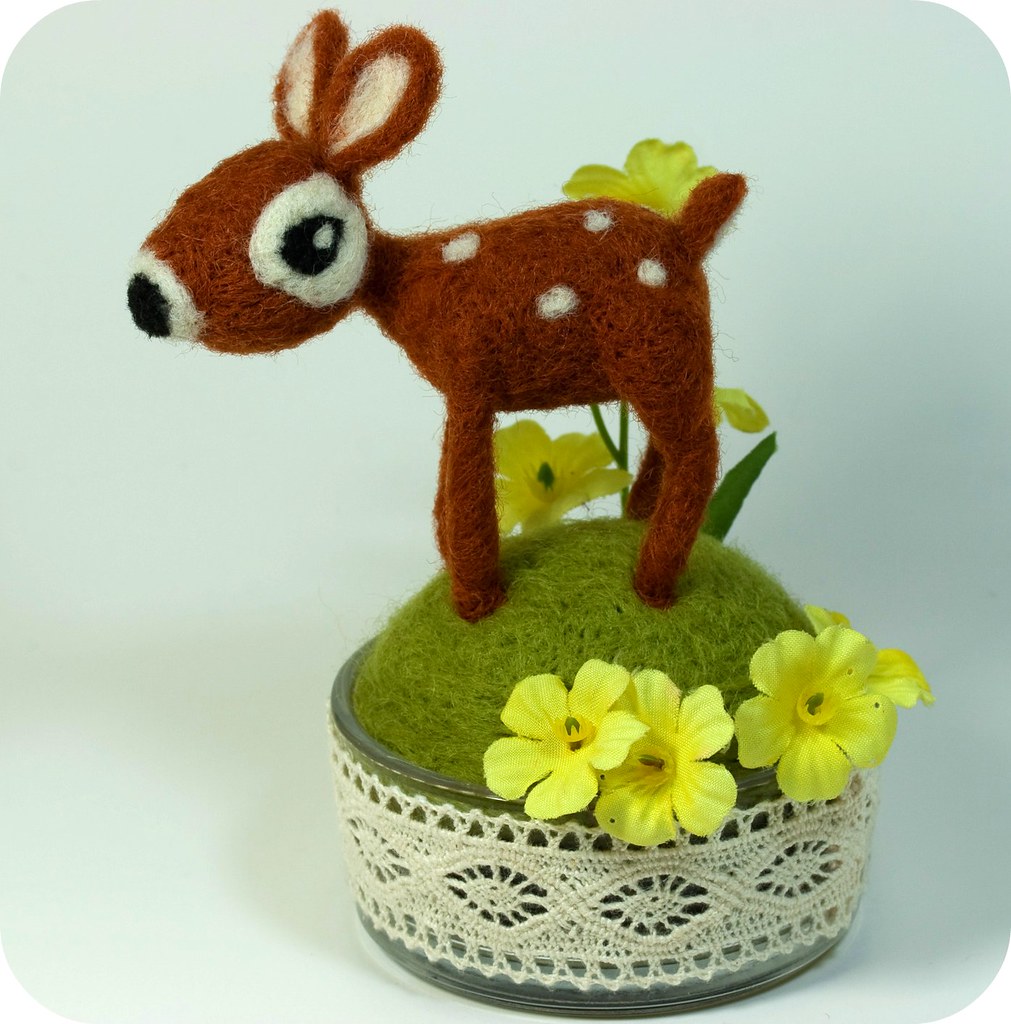
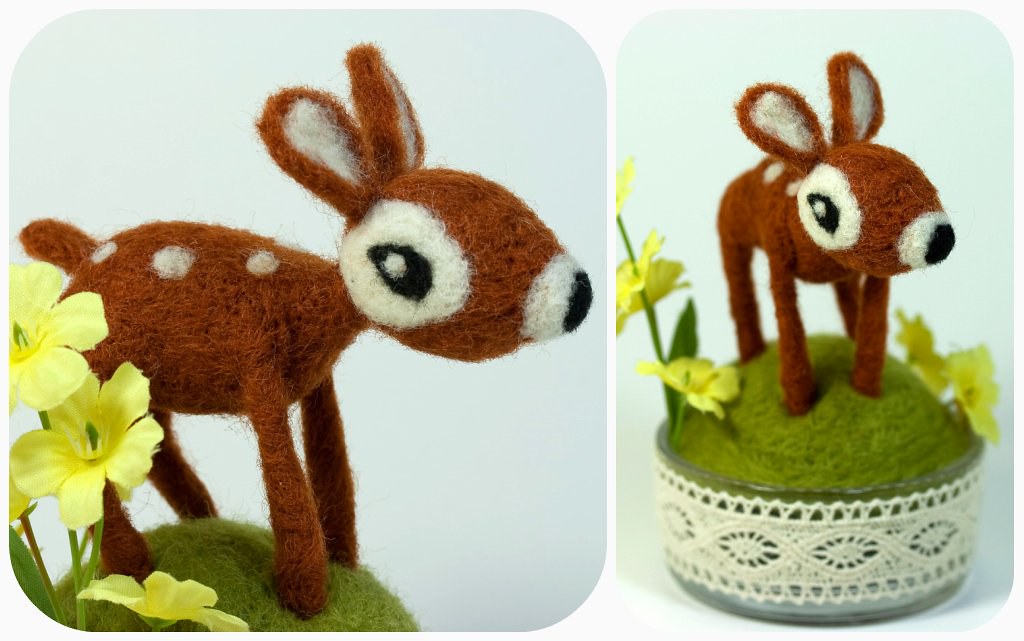
So Cute! Tiny Needle Felted Fawn


Just a quick post to show you this little needle felted fawn. I think she is the cutest thing I have made all year! I was inspired by this little deer made by LuckyNielsen.

I figured out how to make my little deer by breaking down the body into a series of simple shapes. You know those "How to Draw" books we all had as kids that start with simple ovals and cylinders, and with a few extra lines to smooth between them, you have suddenly drawn a dog or a horse or something? I used the same idea, but imagined the shapes in 3D. When you connect the shapes together, using your needle, you smooth the transitions, and with a little extra poking, refine the shapes to look more like the animal you want to achieve. I think you could make anything you can imagine using this principle.

I used pipe cleaners inside the legs for added stability, but I didn't make a wire armature for the whole body, as I have seen other people do. I did it this way because I wanted to felt each leg individually (which is easier) and then attach them one at a time to the body.

This little fawn is only 3" tall. For the base, I made a grassy knoll out of felt that fits inside a large glass tea light holder from Ikea. Then I added a little Japanese cotton lace and some vintage flowers to up the cuteness factor to 100. I considered adding a little bow around her neck, but I thought that might make me pass out from a cute-overload so I held back.

PS: When you start making a super cute little fawn like this, you are just stabbing at blobs of brown felt. But when you add the eyes and the ears and it really starts taking shape, it is like you are repeatedly stabbing Bambi. Which can be a little disturbing. Forewarned is Forearmed.

Sunday, December 5, 2010

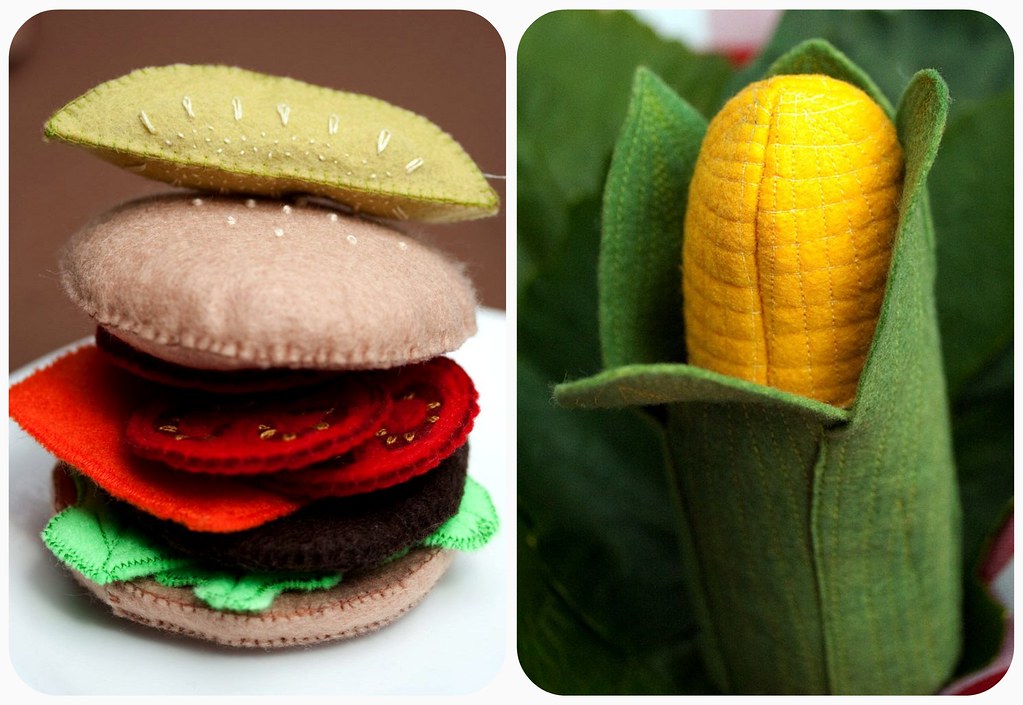
Playing Catch-Up: Felt Playfood Set


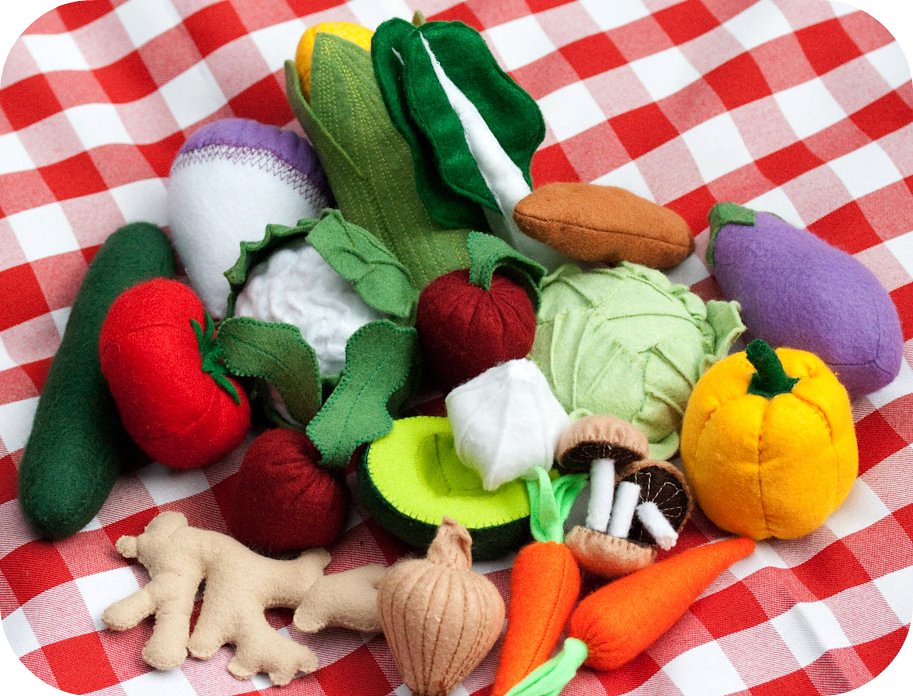
This summer, I made a huge collection of felt foods for my best friends daughter. The project sort of got out of hand because making felt food is more addictive than you would realize. It was interesting and challenging to figure out how each 3D shape could be made from cut shapes of felt. There are lots of tutorials for felt foods out there, so here are just a few pictures to get your imagination going. A small group of felt food pieces would make a great economical present for a young child who likes playing little chef. More pictures on my Flickr.


One of the things I did with this project was try to make it as interactive as possible. Some of the vegetables were made in two or three parts, to show the insides, with velcro buttons so they could be "cut" apart and put back together. Whenever I could, little extras like butter, syrup, cheese, veggie slices or buns were not sewn together so that they could be stacked freely, and mixed and matched in imaginative ways. I actually made a lot of fruits and a few sweet treats as well, but never had the time to photograph them before they went to their new home.

Friday, December 3, 2010

Needle Felted Terrarium and Mushroom Tutorial

A while back, I saw a post on Craft about everlasting terrariums which I really loved. I wanted to do a similar project, but make my own mushrooms with needle felting. This project was extremely fun to do and also looked amazing when it was finished. There are so many ways to customize your terrarium; you could make different mushrooms, add real forest objects like dry leaves, rocks or tiny pine cones, or you could even add kitschy items like vintage ceramic animals or little gnomes.

I had never needle felted anything before, but the low cost for one barbed needle and a couple ounces of wool roving made me confident to just give it a try. I also lucked out and found the perfect glass "terrarium" at a second hand shop for 2$. Needle felting is pretty easy; you just loosely form shapes with your wool, rest them on a piece of thick foam (to protect yourself) and stab at it with the needle until it becomes firm and takes shape. I didn't have any instructions for my mushrooms, and sort of came up with a process as I went along.

To form a mushroom, felt a flattish pancake of wool, adding as you go to the top so that it forms a smooth dome, or whatever profile you want your cap to be. Turn it over and punch an inner circle to make an indent. The wool pulls together and firms up as you needle it, so that is how the indent forms. Roll a log of your stem-coloured wool and fold the bottom end over itself; this will make the stem end a little bulbous when you felt it. Leave the very top of your stem unfelted. Tease this out into a flat circle and center inside your cap. Stab the needle all around the stem into the cap, pushing the "gills" inside the indent. If you are making a polka-dot mushroom, roll tiny balls of wool and attach them to the cap by gently stabbing them with the needle. Be very careful not to stab yourself at that point, the needle is very sharp! I found that when I was finished, there were little stray fluffy hairs that needed to be snipped off with scissors in order to make the surface smooth.

If you follow the Craft tutorial for how to make your terrarium base, I should mention that I pushed wires into my mushroom stems (use a gentle jackhammer motion, twisting didn't work as well) and then just poked them into the moss base instead of using glue. Because nothing is glued down I can rearrange them as much as I like and if I ever want to make any changes I can.

If you live in Victoria, BC and are interested in learning more about needle felting, or if you are looking for a great place to get supplies, I recommend heading over to Knotty By Nature Fibre Arts, on Government St. in Victoria, BC. They were really helpful when I walked in with this project idea and I like supporting local businesses.

I also made some tiny fabric ferns for my terrarium. You can see a photo and short description of how they were made here. I have to be honest and tell you that the ferns were a huge pain in the ass to make. It was an incredibly fiddly job getting all of the leaves to stay on and align properly. If I was to make this again, I would cut the leaves out as attached pairs instead of individually in order to make it easier.